How to Choose the Best Fencing Contractor Gainesville FL for Your Fence Installation Timeline
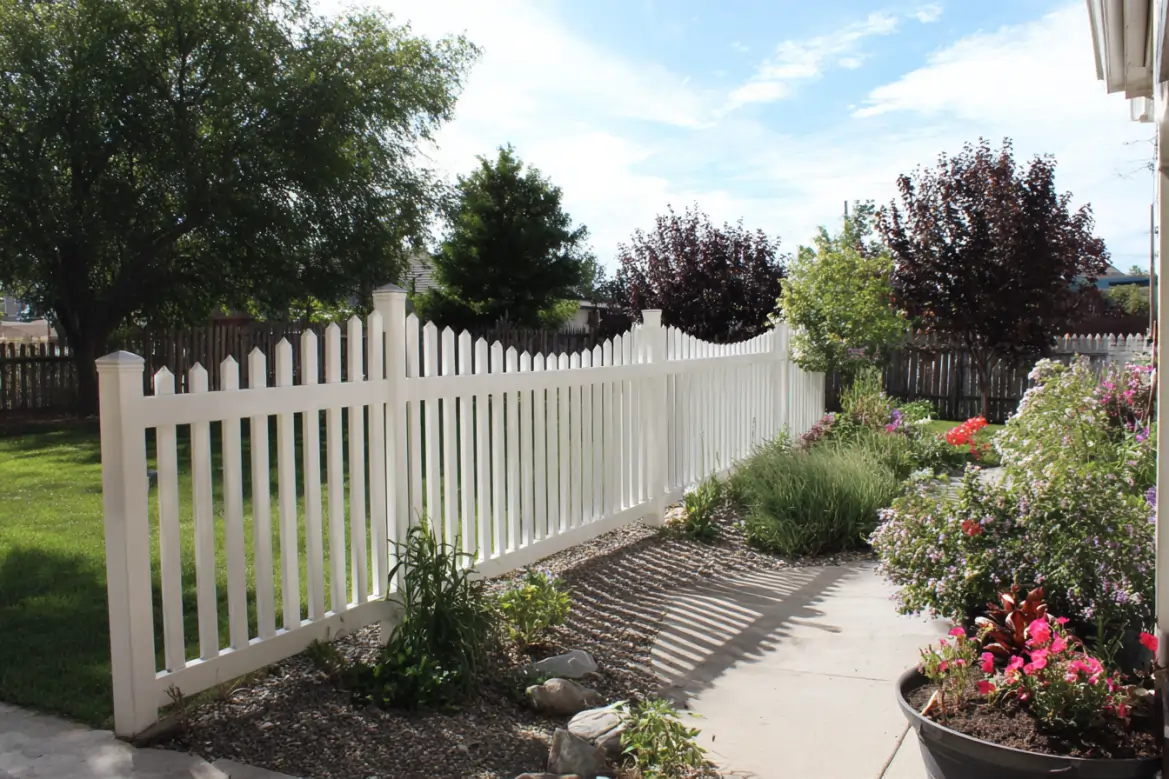
Installing a fence is a significant investment, and understanding the timeline involved can help homeowners better plan their project. The duration of a typical fence installation varies based on several factors, including the type of fencing materials used, property size, weather conditions, and site preparation requirements. On average, most residential fences can be installed within 1-3 days; however, larger or more complex projects may take longer.
Average Time Estimates for Fence Installation
| Fence Type | Approximate Installation Time | Notes |
| Chain-Link Fence | 1-2 Days | Minimal preparation required |
| Wooden Privacy Fence | 2-4 Days | May include staining or treatment |
| Vinyl Fence | 2-3 Days | Prefabricated panels speed process |
| Aluminum/Metal Fence | 2-4 Days | Precise alignment required |
| Ornamental Iron Fence | 3-5 Days or more | Custom designs can add time |
These timelines assume that all materials are readily available and there are no significant delays due to unforeseen issues.
Key Factors Impacting Installation Timeline
- Fence Materials
Different materials require different levels of labor and complexity to install. For example: - Chain-link fences are quicker to install due to their lightweight nature and simpler design.
- Wooden fences may require additional steps such as sealing, staining, or cutting custom pieces.
- Vinyl or composite materials often come in prefabricated panels that streamline installation but may take time if adjustments are needed.
- Property Size and Terrain
Larger properties naturally require more time to enclose than smaller ones. Uneven terrain, rocky soil, or heavily wooded areas also add complexity to the project by requiring additional leveling or clearing work. - Weather Conditions
Weather plays a crucial role in determining how quickly a fence can be installed: - Rainy conditions can delay digging post holes.
- Extremely cold weather may cause soil to freeze, making excavation difficult.
- Windy conditions might affect precise alignment for certain types of fences like picket or ornamental iron.
- Permits and Approvals
Before installation begins, obtaining approval from local municipalities or homeowners’ associations (HOAs) is often necessary. Delays in securing permits can push back start dates significantly. - Site Preparation Requirements
Pre-installation tasks such as clearing vegetation, removing old fencing, or marking utilities can extend timelines if not completed beforehand. Contractors often schedule these tasks separately from actual installation work. - Crew Size and Contractor Experience The size of the contractor’s team affects how quickly your project progresses:
- A well-staffed crew with experienced workers will complete installations faster.
- Less experienced teams may require extra time for adjustments or corrections during the process.
Tips for Reducing Installation Delays
- Confirm that all required permits have been secured before work begins.
- Ensure clear communication with your contractor regarding property boundaries and design preferences.
- Prepare the installation site by clearing debris or obstructions ahead of time.
- Schedule installations during favorable weather seasons whenever possible.
- Choose reliable contractors with proven experience in handling similar projects efficiently.
By understanding these variables and working closely with your chosen contractor, you’ll be better equipped to estimate realistic timelines for installing your fence while avoiding potential setbacks along the way.
Key Red Flags to Watch for When Researching Fence Installation Gainesville FL Companies
When selecting a fencing company, it is crucial to conduct thorough research to ensure you are working with a reliable and professional contractor.
Identifying potential red flags early in the process can save you time, money, and unnecessary stress. Below is a guide to help you spot key warning signs when evaluating fence companies.
Lack of Licensing and Insurance
A reputable fencing company should hold the necessary licenses and carry liability insurance. If a company cannot provide proof of these credentials, it’s a significant red flag. Without insurance, you could be held liable for accidents or damages that occur during the project.
What to Check:
– Verify licensing with your state’s regulatory agency.
– Request proof of general liability and worker’s compensation insurance.
Poor or Nonexistent Online Presence
In today’s business environment, most legitimate companies will have an online presence that includes a professional website or active social media profiles showcasing their work. If there are no reviews, contact information, or examples of past projects available online, proceed cautiously.
Red Flags in This Area:
– A website with no physical address or contact details.
– Numerous negative reviews on platforms like Google, Yelp, or Better Business Bureau (BBB).
– No updated portfolio or images of completed projects.
No Written Contracts or Vague Estimates
Transparent communication is critical when hiring any contractor. A trustworthy fencing company will provide clear written contracts outlining costs, timelines, materials, warranties, and contingencies for delays.
Key Issues to Look For:
– The absence of written agreements—avoid verbal commitments only.
– Unclear cost breakdowns that leave room for unexpected charges.
– “Too good to be true” estimates are significantly lower than competitors.
| Element | What You Should Expect from Reputable Contractors | Red Flag Signs |
| Estimate | Detailed pricing and itemization | Ambiguous numbers with no breakdown |
| Warranty Terms | Written warranty on materials/labor | No mention of warranties provided |
| Payment Schedule | Clear milestones tied to project progress | Full payment requested upfront |
High Pressure Sales Tactics
Beware of companies that use high-pressure sales tactics to push you into signing contracts immediately without sufficient time for comparison shopping or reviewing terms.
Examples Include:
– Offering one-day-only discounts if you sign immediately.
– Overemphasizing urgency without clear reasoning (e.g., claiming prices will rise tomorrow).
Professional contractors respect clients’ decision-making processes and allow adequate time for review before finalizing agreements.
Lack of Experience or References
Experience matters when it comes to fence installation projects. An established company should have references from previous clients who can vouch for their quality of work.
Questions You Should Ask:
1. How many years have you been in business?
2. Can you provide at least three references from recent fencing projects?
3. Do you have any certifications specific to fence installation?
If a company hesitates to provide references or struggles to demonstrate relevant experience with your type of project (e.g., wood fences vs vinyl fences), this could indicate they lack the necessary expertise.
Inconsistent Communication Practices
Be cautious if:
– They take too long to respond to inquiries via phone/email. – Project timelines are vague during discussions. – Representatives seem dismissive when addressing your concerns/questions.
Contractors who fail at proper communication early on may struggle further once the job begins.
By being vigilant about these issues during your search process: you’ll increase chances hiring reliable professionals delivering quality results
Important Questions to Ask Before Starting Fence Repair Gainesville FL Projects
Embarking on a fencing project involves careful planning and communication with your contractor. Asking the right questions is critical to ensure the project meets your expectations, remains within budget, and avoids potential pitfalls. Here’s a guide to essential questions you should address before work begins.
https://gainesvillefencingprousfl.blogspot.com/2026/03/fence-company-gainesville-fl.html
1. What Type of Fence Is Best for My Needs?
Different properties have different fencing requirements. Discuss your goals with the contractor to determine what type of fence is ideal for you:
– Privacy Fences: For homeowners seeking privacy or noise reduction.
– Decorative Fences: Enhance curb appeal without blocking views.
– Security Fences: Designed for durability and added safety.
– Pet Fences: Keeps pets secure while allowing visibility.
Understanding which option fits your property can save time and ensure satisfaction.
2. Are You Licensed, Insured, and Bonded?
Verifying a contractor’s credentials protects you from legal or financial risks in case of accidents or issues during the installation process. Ensure they provide evidence for:
– Licensing: Verify local or state licensing requirements have been met.
– Insurance: Liability insurance covers damages; worker’s compensation protects against job injuries. – Bonding: Offers protection if contractual obligations aren’t fulfilled.
3. What Is Included in the Estimate?
Ask for a detailed, itemized estimate before any work begins. This should include costs for materials, labor, permits, and any additional fees such as debris removal or adjustments to existing landscaping.
| Component | Details To Verify |
| Materials | Type, durability, and aesthetic options |
| Labor Costs | Estimated hours and worker rates |
| Permits/Approvals | Associated costs (e.g., HOA approvals) |
| Site Preparation | Any extra charge for clearing debris/obstacles |
4. How Long Will Installation Take?
Timeline transparency ensures proper planning on your end: – Ask about factors that may delay the project (weather conditions, supply chain issues).
– Inquire whether multiple workers will be assigned to speed up progress.
5. What Warranties Do You Offer?
A robust warranty guarantees peace of mind about both materials and workmanship quality: – Material warranties from manufacturers typically cover defects over several years. – Workmanship warranties protect against installation errors.
Ensure written documentation is provided for both warranties.
6. How Do You Handle Utilities and Property Lines?
Confirming these logistical details minimizes future disputes: – Utility Marking: Contractors should notify utility companies to mark underground lines prior to digging. – Property Lines Verification: It’s important contractors confirm boundary lines using surveys or local records before starting work.
7. What Maintenance Will My Fence Require?
Some fences need routine upkeep to maintain their structural integrity and appearance: – Wood fences often require sealing or staining every few years. – Vinyl fences are low-maintenance but may need occasional cleaning. – Metal fences (e.g., aluminum) might need rust prevention treatments over time.
Discuss maintenance instructions specific to your chosen fence material so you’re prepared long-term.
Final Thoughts
Asking these essential questions not only helps clarify project details but also ensures transparency between you and your contractor. Open communication fosters trust while safeguarding against misunderstandings during one of the most significant home improvement projects you’ll undertake — installing a fence tailored perfectly to your needs.
Essential Questions to Ask Your Contractor Before Starting a Fencing Project
1. What Is Included in the Estimate?
- Materials (e.g., wood, vinyl, metal)
- Labor costs
- Permits and approvals
- Cleanup and waste removal
- Additional charges (e.g., for custom designs or unforeseen site conditions)
A transparent breakdown will help you budget effectively and compare bids from multiple contractors.
2. Are You Licensed, Insured, and Bonded?
- A valid business license
- General liability insurance to cover property damage
- Workers’ compensation insurance for employee injuries
- Bonding to protect against incomplete or substandard work
Request copies of documentation for your records.
3. How Long Will the Project Take?
The timeline for fencing projects can vary depending on factors like fence type, property size, and weather conditions. Ask your contractor to provide an estimated start date, duration of work, and potential delays.
| Task | Estimated Timeframe |
| Permit acquisition | 1–2 weeks |
| Material delivery | 3–5 days |
| Site preparation | 1–2 days |
| Fence installation | 2–4 days (depending on size) |
Discuss how unforeseen issues might affect the schedule.
4. Will You Handle Permits and Approvals?
Installing a fence often requires permits or approvals from local authorities or homeowners’ associations (HOAs). Confirm whether the contractor will handle these processes or if it falls under your responsibility. If they manage it, ask if permit fees are included in the estimate.
5. What Type of Warranty Do You Offer?
- Duration of coverage (e.g., one year vs lifetime warranties)
- Specific exclusions (e.g., weather damage or misuse)
- Process for filing claims
Having clear warranty terms can save you time and money if problems arise in the future.
6. How Do You Handle Property Lines?
- Verify property lines using surveys or plats
- Communicate any encroachments with neighbors
- Follow local zoning regulations regarding setback distances
Being proactive about property lines helps prevent legal disputes post-installation.
7. What Is Your Policy on Utilities?
- The contractor coordinates with utility companies to mark lines
- There are additional fees for this service
This step ensures compliance with “Call Before You Dig” regulations in your area.
Final Thoughts
By asking these critical questions upfront, you can establish clear expectations with your fencing contractor while minimizing issues during installation. A professional approach will help ensure your project stays on track and within budget while providing peace of mind about quality and compliance.
How Does Fence Type Impact Installation Time and Costs?
When planning a fencing project, the type of fence you choose significantly influences both the installation timeline and overall costs. Each fence type comes with unique materials, construction methods, and maintenance requirements, all of which can affect how long it takes to complete the project and how much it will cost.
Factors That Affect Installation Time by Fence Type
- Timeline: Wooden fences generally take longer to install due to the need for precise cutting, sealing, and finishing. On average, installation can take 3-5 days depending on the size of the project and weather conditions.
- Considerations: Pre-staining or painting wood panels before installation may add time upfront but reduces long-term maintenance.
- Timeline: Vinyl fences are often faster to install compared to wood because they come as pre-manufactured panels that easily fit together. Installation typically takes 1-3 days.
- Considerations: While quick to install, vinyl requires careful alignment for a professional finish.
- Timeline: Chain link fences are relatively quick to install due to their lightweight nature and simple design. Most projects are completed within 1-2 days for residential properties.
- Considerations: Adding privacy slats or custom features may extend installation time slightly.
- Timeline: These types of fences require more precise placement due to their heavier weight and rigid structure. Installation generally takes about 2-4 days depending on site conditions.
- Considerations: Special tools may be required for cutting metal panels or posts.
Cost Implications by Fence Type
| Fence Type | Average Material Costs (per linear foot) | Labor Costs (per linear foot) | Total Cost (per linear foot) |
| Wood | $10-$30 | $8-$15 | $18-$45 |
| Vinyl | $20-$40 | $5-$10 | $25-$50 |
| Chain Link | $8-$20 | $7-$12 | $15-$32 |
| Aluminum/Steel | $25-$60 | $10-$20 | $35-$80 |
Key Considerations When Choosing a Fence Type
- Budget Constraints: Chain link remains one of the most affordable choices but offers limited aesthetic appeal compared to wood or vinyl.
- Maintenance Needs: Vinyl and metal fences require less maintenance than wood but may have higher upfront costs.
- Property Functionality: For privacy-focused projects, wooden or vinyl fences are ideal; for security purposes, metal options work best.
By carefully evaluating these factors alongside your property’s specific requirements, you can make an informed decision about the best fence type that aligns with your timeline and budget expectations. Understanding these impacts ensures smooth planning while minimizing unexpected delays or costs in your fencing project.
Will Contractors Handle Utilities, Property Lines, and Other Legal Aspects of Fencing?
When planning a fencing project, addressing legal and logistical aspects is a critical step. Professional fencing contractors often assist with such requirements, but understanding their responsibilities can help ensure a smoother process. Below is an overview of how contractors typically handle utilities, property lines, and other legal considerations.
Utilities: Locating and Avoiding Underground Lines
- Contact Local Utility Companies: Contractors typically coordinate with utility providers by calling the local “Call Before You Dig” or 811 service.
- Mark Utility Lines: Once contacted, utility companies send professionals to mark underground lines with flags or paint.
- Plan Around Obstacles: Contractors adjust fence placement or digging methods to avoid utility lines.
Failing to address this step can lead to fines or service disruptions. It’s worth confirming with your contractor that this task will be handled before construction begins.
Property Lines: Ensuring Accurate Placement
- Verify Boundary Markers: Reliable companies ask for surveys or existing documentation that clearly defines your property boundaries.
- Consult With Surveyors: If no survey exists or if boundaries are unclear, they may recommend hiring a licensed surveyor.
- Obtain Neighbor Consent (If Required): In some cases—such as shared fences—contractors may suggest discussing plans with adjacent property owners.
Property line accuracy is crucial not only for avoiding conflicts but also for complying with local zoning regulations.
Permits and Zoning Compliance
- Research Local Regulations: Contractors often check height restrictions, set-back requirements, and material limitations imposed by municipalities.
- Secure Permits: A trustworthy fencing company usually applies for permits on behalf of the homeowner if needed.
- Compliance With Homeowners’ Associations (HOAs): In HOA-regulated communities, contractors can help navigate approval processes by providing necessary plans and documentation.
If your contractor does not offer this service directly, they should at least guide you through the steps required to meet legal obligations.
Neighbor Relations: An Overlooked Aspect
- Inform neighbors about the construction schedule ahead of time to minimize disruptions.
- Clarify whether shared fences will impact costs or maintenance agreements.
- Respect noise restrictions during installation hours.
A professional contractor may offer advice on how best to approach these conversations.
Pro Tips When Hiring a Contractor
| Checklist | Details |
| Confirm Services | Ask if the contractor handles utilities marking and permits directly. |
| Verify Experience | Choose a contractor familiar with local regulations in your area. |
| Review Contracts | Ensure contracts include clauses addressing compliance responsibilities. |
By choosing an experienced contractor who takes care of these critical elements upfront, you can avoid delays—and potential legal issues—down the road while ensuring your fence installation meets all necessary requirements.
Fencing vs Retaining Walls: Choosing the Best Option with a Fence Company Gainesville FL
When it comes to defining property boundaries, both fencing and retaining walls serve important but distinct purposes. Deciding between the two depends on several factors, including functionality, aesthetic preferences, budget, and the specific needs of your property. Below is a detailed breakdown to help you make an informed decision.
Understanding the Purpose of Fencing and Retaining Walls
- Primarily used for privacy, security, and aesthetic enhancement of a property.
- Acts as a barrier to keep animals or intruders out while clearly marking property lines.
- Comes in a variety of materials such as wood, vinyl, aluminum, chain link, or composite options.
- Designed to hold back soil and prevent erosion on sloped properties.
- Helps create flat spaces for landscaping or construction purposes.
- Often built with materials like concrete blocks, stone, timber, or brick for durability.
Comparing Fencing and Retaining Walls
| Feature | Fencing | Retaining Walls |
| Primary Function | Privacy, security & boundary marking | Erosion control & structural support |
| Installation Cost | Typically lower | Higher due to material & labor costs |
| Aesthetic Options | Wide variety | Limited by materials |
| Durability | Moderate (depends on material) | High (especially with concrete) |
| Maintenance Needs | Periodic painting or repairs | Minimal maintenance required |
Factors to Consider When Choosing Between Fencing and Retaining Walls
- If your property is flat and only requires boundary definition or privacy enhancement, fencing is likely sufficient.
- For properties with steep slopes or significant changes in elevation, retaining walls are essential to stabilize soil.
- Fences generally cost less upfront than retaining walls. However, high-end fence materials like wrought iron can be more expensive than basic retaining wall structures.
- Factor in long-term maintenance costs; fences may require more routine upkeep compared to retaining walls.
- Check local building codes before installing either option.
- Retaining walls beyond specific heights may require engineering approval or permits due to safety concerns.
- Fences offer more options for style customization (e.g., picket fences for charm vs modern horizontal slats).
- Retaining walls provide a clean and functional look but are limited when it comes to design flexibility.
- Wooden fences may require treated lumber that raises environmental concerns.
- Retaining walls can mitigate issues like stormwater runoff but need careful design to avoid long-term drainage problems.
When You Might Need Both
In some cases, both fencing and retaining walls are necessary:
– A sloped property might benefit from a retaining wall at its base while adding a fence atop it for privacy and safety. – For tiered gardens or multi-level landscape designs where both structural support and boundary demarcation are essential.
By carefully evaluating the specific needs of your property alongside local regulations and budget constraints, you can choose the ideal solution that balances form and function effectively for your outdoor space.
- How to Choose the Best Fencing Contractor Gainesville FL for Your Fence Installation Timeline
- How to Choose the Best Fence Company Gainesville FL for Your Property
- How a Fence Company Gainesville FL Can Help Solve Common Fence Problems Homeowners Face
- How to Choose the Best Fencing Contractor Gainesville FL for Your Property
- Effective Solutions for Fence Issues with a Fencing Contractor Gainesville FL
- Expert Advice from a Fencing Contractor Gainesville FL on Repairing and Strengthening Your Fence
- Effective Fencing Repair Solutions from a Trusted Fence Company Gainesville FL
- Fence Repair Gainesville FL: Understanding How Long It Really Takes
- How to Choose the Best Fencing Contractor Gainesville FL for Your Residential or Commercial Project
How to Choose the Best Fence Company Gainesville FL for Your Property
Choosing the right fence installation company is a critical step in ensuring that your fencing project meets both your functional needs and aesthetic preferences. With so many companies offering similar services, narrowing your options can seem overwhelming. By focusing on key factors such as experience, customer reviews, and services offered, you can make an informed decision. Below are guidelines to help you identify a reliable and professional fence installation partner.
Define Your Requirements
Before contacting any company, clearly outline what you need from your fence.
- What is the primary purpose of the fence?Is it for security, privacy, aesthetics, or marking property boundaries?
- What material do you prefer?Options include wood, vinyl, aluminum, chain link, or composite materials. Each has its own pros and cons in terms of durability, maintenance requirements, and cost.
- What is your budget?Understanding how much you’re willing to spend will help eliminate companies outside your price range.
Having clarity about these factors will allow you to communicate effectively with potential contractors.
Researching Local Companies
Start by researching fencing contractors in your area.
- Check online reviews and testimonials:Platforms like Google Reviews or Yelp provide valuable insights into customer experiences.
- Ask for recommendations:Friends, family members, or neighbors who have recently installed fences may be able to recommend reliable contractors.
- Look for local expertise:Companies familiar with regional climate conditions and local regulations are often better equipped to deliver quality results tailored to your area.
Key Questions to Ask Potential Contractors
- How long have they been in business?
- Can they provide references from past projects similar to yours?
- Are they insured and licensed?
- Do they offer warranties on materials and labor?
Their answers will give insight into their professionalism and reliability.
Evaluating Services Offered
Not all fencing companies offer the same array of services. Some may specialize in specific materials like wrought iron or vinyl but lack expertise in others such as wood or bamboo. Look for a contractor whose portfolio aligns with your project’s needs.
| Feature | Company A | Company B | Company C |
| Years of Experience | X years | X years | X years |
| Material Specialization | Vinyl/Wood | Aluminum/Chain Link | Composite/Vinyl |
| Warranty Provided | Yes (X years) | No | Yes (X years) |
| Customer Reviews | 4.5/5 | 3/5 | 4/5 |
Watch Out for Red Flags
- Unlicensed contractors who cannot verify their credentials.
- Extremely low bids that seem too good to be true (these may indicate subpar materials or workmanship).
- Poor communication or significant delays in providing quotes.
By taking the time to thoroughly vet potential fence installation companies using these steps, you’ll increase the likelihood of receiving quality service while avoiding common pitfalls associated with hiring unqualified contractors.
Finding the Right Fencing Contractor Gainesville FL: Choosing the Best Material for Your Fence
When planning to install a fence, one of the most critical steps is assessing your needs. Your choice of fencing should depend on its intended purpose, the materials best suited for your property, and your budget. Below are key considerations to help you make an informed decision.
Determining the Purpose of Your Fence
Understanding why you need a fence is essential in narrowing down your options.
- Security:Protecting your property from intruders or ensuring pets and children stay safe within the yard.
- Privacy:Creating a secluded space that shields your home from prying eyes or reduces outdoor noise.
- Aesthetic Appeal:Enhancing the curb appeal of your property with a decorative and visually appealing design.
- Property Boundaries:Clearly defining property lines to avoid disputes with neighbors or clarify ownership limits.
- Safety:Ensuring pool areas are secure or preventing wildlife from entering specific zones of your property.
By defining the purpose clearly, you can choose fencing materials and designs that align with your specific requirements.
Choosing the Right Material for Your Fence
The material you select will significantly impact durability, maintenance requirements, and overall cost.
| Material | Pros | Cons | Ideal For |
| Wood | Natural look; customizable; affordable | Susceptible to rot; requires upkeep | Privacy and aesthetic appeal |
| Vinyl | Low maintenance; weather-resistant | Higher initial cost | Long-lasting privacy or decorative fences |
| Chain Link | Affordable; durable; allows visibility | Lacks privacy; utilitarian appearance | Security without visual barriers |
| Aluminum | Rust-resistant; lightweight | Less sturdy than steel | Decorative accents around landscapes |
| Steel | Strong and secure | Expensive; may rust if not treated | High-security areas |
Each material has its advantages and disadvantages depending on factors such as climate conditions, maintenance capacity, budget constraints, and aesthetic preferences.
Factors to Consider Based on Location
- Urban Areas:Opt for fences that maximize privacy while adhering to local regulations. Materials like vinyl or wood are popular in residential neighborhoods.
- Rural Areas:Choose durable options like chain link or aluminum for large properties requiring minimal maintenance over time.
- Coastal Regions:Use corrosion-resistant materials like vinyl or aluminum to withstand moisture exposure from salt air.
Balancing Budget with Long-Term Value
While initial costs are essential to consider, it’s equally critical to evaluate long-term expenses such as maintenance, repair needs, and lifespan.
- A wood fence may have a lower upfront cost but could require more frequent staining or sealing over time.
- Vinyl fences come at a higher price initially but typically incur fewer maintenance costs in their lifespan.
By carefully assessing these aspects—purpose, material suitability, environmental conditions, location-specific demands—you can ensure that your investment meets both functional and aesthetic goals effectively.
Essential Tips for Fence Installation Gainesville FL Homeowners Should Know
Choosing the right fence installation company is a critical step in ensuring that your fencing project is successful. A well-installed fence not only enhances the aesthetics of your property but also improves functionality, privacy, and security. Below are the top factors to consider when researching fence installation companies.
Reputation and Reviews
A company’s reputation speaks volumes about the quality of its services.
– Check online reviews: Look for customer feedback on platforms like Google Reviews, Yelp, and social media. Pay attention to patterns (e. g. , consistently late work or exceptional professionalism).
– Ask for references: Request client references from the company. Contact these individuals to learn about their experience with the installer.
– Word-of-mouth recommendations: Speak with friends, neighbors, or colleagues who have recently undertaken similar projects.
Experience and Expertise
Fence installation requires both technical skills and knowledge of specific materials and site conditions.
– Years in business: Companies with a longer track record are often more reliable.
– Specialization: If you need a specific type of fence (e. g. , chain-link, vinyl, or wood), ensure the company has demonstrated experience with that material.
– Portfolio: Ask to see examples of previous work through photos or project descriptions.
Range of Services Offered
Not all fencing companies offer comprehensive services.
– Custom design capabilities for fences tailored to your property’s layout or aesthetic goals.
– Assistance with obtaining necessary permits or navigating local regulations (if applicable).
– Post-installation support such as repairs or maintenance guidance.
Pricing Transparency
Cost is an important consideration, but it should never outweigh quality and reliability.
| Aspect | Key Questions |
| Itemized Estimates | Does the company provide a detailed breakdown of labor, materials, equipment fees, etc.? |
| Hidden Costs | Are delivery charges or permit fees included upfront? Are there any potential surprise costs? |
| Payment Structure | Is there flexibility in payment plans? How much is required as a deposit? |
Avoid companies that offer unusually low bids without clear explanations; this could indicate subpar workmanship or materials.
Licensing and Insurance Coverage
Ensuring legal compliance protects you as a homeowner from liability during the project: – Verify that the company holds proper licenses required by your state or municipality. – Confirm liability insurance to cover property damage. – Check worker’s compensation coverage in case employees are injured while working on your property.
Customer Service and Communication
A strong working relationship is key to any successful project: 1. Evaluate responsiveness during initial inquiries—companies slow to respond might indicate poor overall service. 2. Assess their willingness to answer questions thoroughly about processes, timelines, and expectations. 3. Look for professionalism in every interaction—whether over email, phone calls, or face-to-face consultations.
By prioritizing these factors during your research process, you’ll be better equipped to select a reputable fencing contractor capable of meeting your needs effectively while ensuring value for money expended on this significant investment.

How to Ensure Quality Fence Repair Gainesville FL by Checking Licenses and Warranties
When hiring a fence installation company, ensuring the company’s legitimacy and reliability is one of the most critical steps. Verifying licenses, certifications, and warranties protects you as a property owner and ensures that your investment is handled professionally. Below we outline why these factors are important and how to evaluate them effectively.
Why Verifying Licenses Matters
A license demonstrates that the fence installer meets local and state requirements to perform their work legally and competently. Hiring an unlicensed contractor puts you at risk of substandard installation practices or potential fines if the work violates local regulations.
- Compliance with Local Laws: Many regions require contractors to hold specific licenses for construction projects, including fences.
- Insurance Coverage: Licensed contractors are more likely to carry liability insurance to protect against damages or accidents.
- Accountability: Licensing authorities often have mechanisms for addressing complaints or disputes.
When reviewing licenses: – Request a copy of the company’s license or check with your local licensing board. – Confirm that the license is current and valid in your jurisdiction.
The Role of Certifications in Quality Assurance
Certifications go beyond basic licensing requirements by demonstrating specialized expertise or training in fence installation techniques. While not always required, certifications can be a strong indicator of professionalism.
Key benefits of hiring certified installers include: – Advanced Skills: Certified professionals often undergo additional training on materials, tools, and modern installation methods.Manufacturer Partnerships: Many manufacturers certify installers who are trained to properly handle their products, which can lead to extended warranties on materials.
Look for certifications from industry organizations such as: | Certification Body | Significance | |———————————–|————————————————–| | American Fence Association (AFA) | Recognized standards in fencing expertise | | National Association of Home Builders (NAHB) | Advanced construction knowledge |
The Significance of Warranties
Warranties provide peace of mind by ensuring that any defects or issues after installation will be addressed by the contractor. Depending on the company, warranties may cover either labor or materials—or both.
When evaluating warranties: 1.Labor Warranty: Covers workmanship quality (e. g. , proper alignment or secure post placement). Ensure clarity on its duration—commonly 1–3 years. 2.Material Warranty: Covers defects in fencing materials such as warping, cracking, or rusting over time. Often offered directly by manufacturers.
Questions to ask about warranties: – What does the warranty specifically cover? – How long does it remain effective? – Are there any conditions that might void it?
By verifying licenses, certifications, and warranties before hiring an installer, you reduce potential risks while ensuring high-quality results for your fencing project. Always take time to request documentation upfront—it could save significant headaches down the line.
The Importance of Verifying Licenses, Certifications, and Warranties with a Fence Installer
When it comes to hiring a fence installation company, verifying licenses, certifications, and warranties is a critical step in ensuring the success and quality of your project. These elements not only protect you as a property owner but also serve as indicators of professionalism, reliability, and expertise in the fencing industry. Here’s why each aspect matters and what you should look for during the verification process.
Why Licenses Are Essential
Licenses demonstrate that the contractor meets state or local regulations for fence installation work. Licensed professionals are more likely to follow established standards and safety protocols. Moreover, working with an unlicensed contractor could lead to legal complications or subpar results.
When checking for licensing: – Verify the license number with your local licensing authority. – Ensure the license is current and applies specifically to fencing or construction work. – Confirm whether additional licenses are required for specific tasks like electrical work (e. g. , if your fence includes automated gates).
The Role of Certifications
Certifications indicate that the installer has undergone specialized training or has achieved recognition from professional organizations within the fencing or construction industry. Although not always mandatory, they can provide peace of mind regarding the installer’s competence in their field.
Key certifications to look for: – Certified Fence Professional (CFP):Recognized by trade organizations like the American Fence Association (AFA), this certification confirms extensive knowledge in fence installation practices.OSHA Safety Certification:This ensures that workers adhere to workplace safety standards. – Manufacturer-specific certifications: Some installers hold certifications from manufacturers, demonstrating expertise in working with certain materials (e. g. , vinyl or composite fences).
Evaluating Warranties
A reputable company will offer warranties covering both labor and materials. These warranties act as guarantees that any defects or issues within a specified timeframe will be resolved at no additional cost. Comprehensive warranties are especially important for fences exposed to harsh weather conditions over time.
When reviewing warranties: – Confirm coverage details: Does it include structural defects? Is paint finish covered? – Understand timeframes: Labor warranties often last 1–2 years; material warranties may extend up to 15 years depending on the product used. – Ask about exclusions: For example, many warranties do not cover damage caused by improper maintenance or external factors like storms.
| Aspect | What to Check | Why It Matters |
| Licensing | Verify validity and relevance | Ensures compliance with local regulations |
| Certifications | Look for CFPs or manufacturer endorsements | Confirms expertise and specialized knowledge |
| Warranties | Review terms & conditions; note exclusions | Protects against unexpected costs from defects |
Tips for Verification
To avoid potential pitfalls during your fence installation project: 1. Request proof of licenses and certifications upfront. 2. Cross-check information through official databases where possible. 3. Read warranty policies carefully before signing any contracts.
By taking these steps proactively, you can safeguard yourself against poor workmanship while ensuring long-term value from your investment in professional fencing services.
Ensuring Compliance with Building Codes, Permits, and Local Regulations for Fencing Projects
When planning a fencing project, ensuring compliance with building codes, permits, and local regulations is critical. Neglecting these considerations can lead to fines, legal issues, or even the removal of your fence. Below is a detailed guide to help homeowners and property managers navigate these requirements effectively.
Research Local Zoning Laws
Before beginning your fencing project, research the zoning laws in your area.
– Fence Height:Maximum height allowances may vary between front yards and backyards (e. g. , 3-4 feet for front yards, 6-8 feet for backyards).
– Placement:Restrictions on how close the fence can be to property lines, sidewalks, or streets.
– Material Restrictions:Some neighborhoods may prohibit certain materials (e. g. , chain-link fences in residential areas).
Contacting your local government office or visiting their website is a good starting point to understand these rules.
Securing Required Permits
Many municipalities require permits for fence installation projects.
1. A detailed site plan showing proposed fence placement relative to property boundaries and existing structures.
2. Information about the type of materials and design of the fence.
Applications are reviewed for compliance with building codes and zoning ordinances before approval is granted. Skipping this step can delay your project significantly or result in penalties later.
| Permit Considerations | Description |
| Cost | Permit fees vary by location but typically range from $50-$200 depending on the scope of work. |
| Processing Time | Approval timelines can range from a few days to several weeks depending on jurisdiction workloads. |
Understanding HOA Rules (If Applicable)
– Approved materials, styles, and colors may be outlined in HOA agreements. – Installation timelines might need pre-approval from HOA boards. Failing to adhere to HOA rules could result in fines or mandated adjustments post-installation.
- How to Choose the Best Fencing Contractor Gainesville FL for Your Fence Installation Timeline
- How to Choose the Best Fence Company Gainesville FL for Your Property
- How a Fence Company Gainesville FL Can Help Solve Common Fence Problems Homeowners Face
- How to Choose the Best Fencing Contractor Gainesville FL for Your Property
- Effective Solutions for Fence Issues with a Fencing Contractor Gainesville FL
- Expert Advice from a Fencing Contractor Gainesville FL on Repairing and Strengthening Your Fence
- Effective Fencing Repair Solutions from a Trusted Fence Company Gainesville FL
- Fence Repair Gainesville FL: Understanding How Long It Really Takes
- How to Choose the Best Fencing Contractor Gainesville FL for Your Residential or Commercial Project
How a Fence Company Gainesville FL Can Help Solve Common Fence Problems Homeowners Face

Fences play an essential role in defining property boundaries, providing privacy, and enhancing curb appeal. Over time, however, homeowners may encounter common fence issues that require attention. Understanding these challenges and knowing how to address them can help maintain the longevity and functionality of your fence.
1. Leaning or Sagging Fence Posts
One of the most frequent problems homeowners face is leaning or sagging fence posts caused by soil erosion, water damage, or improper installation.
How to Address This Issue: – Inspect the base of the post for rot or weakening. – Re-dig the post hole if necessary and stabilize it with concrete. – Replace severely damaged posts with new ones for long-term stability.
2. Rotting Wood
Wooden fences are particularly susceptible to rot due to prolonged exposure to moisture. This issue not only weakens the structure but also affects its aesthetic appeal.
Preventative Measures: – Use pressure-treated wood or apply a high-quality sealant regularly. – Ensure proper drainage around your fence to reduce water pooling near the base.
If rot has already set in: – Replace rotting boards promptly. – Sand down any affected areas before applying a weather-resistant coating.
3. Broken or Missing Boards
Over time, individual boards can crack, warp, or even go missing due to external factors like windstorms or general wear and tear.
Repair Tips: – Tighten loose boards with galvanized screws. – Remove broken boards and replace them with new ones of matching size and material.
Pro Tip: Always keep spare boards on hand for quick replacements.
4. Rusted Metal Fences
For fences made of wrought iron or chain-link materials, rust can be a persistent issue that compromises both appearance and durability.
Steps for Rust Removal: 1. Scrub rusty areas using a wire brush. 2. Apply rust-inhibiting primer followed by paint designed for metal surfaces. 3. Regularly inspect your metal fence for early signs of rust to catch problems before they worsen.
5. Gate Alignment Issues
A misaligned gate is another common problem that can disrupt functionality and security. This issue often arises from hinge damage, shifting posts, or wear on hardware components.
Solutions: – Tighten loose hinges using appropriate hardware tools. – Adjust gate latches for proper alignment. – If necessary, replace hinges with durable materials designed for outdoor use.
6. Pest Damage
Wooden fences are prone to pest infestations such as termites that can weaken their structural integrity over time.
Prevention Methods: – Treat wood with pest-resistant coatings. – Conduct annual inspections specifically looking for signs of termite activity (e.g., small holes or sawdust piles).
What To Do If Damage Has Occurred: Engage a pest control professional immediately before replacing compromised sections of your fence.
Fencing Contractor Gainesville FL: Common Fence Problems Explained
| Problem | Cause | Solution |
| Leaning/Sagging Posts | Soil erosion/weather damage | Replace/reinforce posts; use concrete |
| Rotting Wood | Moisture exposure | Seal wood; replace affected sections |
| Broken/Missing Boards | Storms/wear & tear | Replace boards; tighten screws |
| Rusted Metal Fences | Exposure to elements | Remove rust; paint & seal metal |
| Misaligned Gate | Hinge/post shifts | Adjust/replace hinges as needed |
| Pest Damage | Termites/insects | Treat wood; conduct regular checks |
By addressing these common issues promptly and implementing preventative measures where possible, homeowners can extend the life span of their fences while maintaining their appearance and utility over time.
Essential Tips for Fence Installation Gainesville FL and Choosing the Right Materials
Fences come in a variety of materials, each with its own set of repair requirements. Whether you have a wooden, vinyl, chain link, or wrought iron fence, it’s important to understand the common issues that may arise and how best to address them. Below is a detailed guide on repair needs for different fencing materials.
Wooden Fences
Wooden fences are popular due to their aesthetic appeal and versatility. However, they are prone to weather-related damage.
Common Issues: – Rotting wood: Caused by prolonged exposure to moisture. – Warping or splitting: Results from changes in temperature and humidity. – Insect infestations: Termites or carpenter ants can weaken the wood.
Repair Tips: – Replace rotting boards as soon as possible to prevent spreading. – Apply a weather-resistant sealant every few years to protect against moisture damage. – Treat wood with insecticides if pests are present.
| Problem | Repair Solution | Preventative Measure |
| Rotting Wood | Replace affected boards | Apply sealant regularly |
| Warping/Splitting | Sand down edges; replace warped planks | Maintain consistent staining |
| Insect Damage | Use insecticides or replace wood | Use treated lumber |
Vinyl Fences
Vinyl fences are durable and low maintenance but can still encounter specific problems over time.
Common Issues: – Cracks and holes: Often caused by impact or extreme temperature changes. – Discoloration: Due to exposure to sunlight or environmental pollutants. – Loose panels: Caused by wear on fasteners or high winds.
Repair Tips: – Fill small cracks with vinyl adhesive or repair kits available at hardware stores. – Clean discoloration using a mild soap solution or specialized vinyl fence cleaners. – Tighten screws on brackets if panels become loose; replace any damaged fasteners.
Chain Link Fences
Chain link fences are highly durable but may require repairs due to wear and tear over time.
Common Issues: – Rust formation: A result of prolonged exposure to rain and humidity. – Bent links or posts: Often caused by physical impact. – Sagging fabric mesh: Occurs when tension loosens over the years.
Repair Tips: 1. Remove rust using sandpaper or rust-removing chemicals; apply a rust-resistant primer afterward.
2. Straighten bent links using pliers or replace severely damaged sections.
3. Re-tension loose mesh by adjusting the tension bar and clips along the fence line.
Wrought Iron Fences
Wrought iron fences offer elegance and strength but require proper maintenance to avoid deterioration.
Common Issues: – Rust corrosion: As wrought iron is susceptible to oxidation if not maintained properly. – Bent bars: Often caused by accidental collisions or heavy impact. – Paint chipping: Exposing the metal underneath to potential rusting.
Repair Tips: 1. Sand away any rust spots and apply a fresh coat of metal-grade paint for protection.
2. Heat bent bars (if necessary) before reshaping them carefully with tools like clamps.
3. Schedule regular inspections for cracks that might compromise structural integrity.
Essential Tips for Fence Repair Gainesville FL: Maintaining All Fence Types
- Inspect your fence periodically for visible damage like cracks, rot, rust, or loose components.
- Clean dirt and debris buildup at least twice annually using appropriate cleaning methods specific to your fence material type.
- Use protective coatings (e.g., stains, sealants, paint) depending on the material’s susceptibility factors like water damage or UV exposure.
By understanding these specific repair needs based on fencing materials, you can ensure that your property remains secure while preserving its aesthetic value for years ahead.
Understanding Repair Needs for Different Types of Fencing Materials
Fencing materials vary widely in terms of durability, maintenance requirements, and susceptibility to damage. Understanding the unique repair needs of different materials is crucial for prolonging the life and functionality of your fence. Below, we explore common fencing materials, their typical issues, and how to address them effectively.
Wood Fences
Wood fences are a popular choice for their natural beauty and versatility. However, they are prone to certain issues due to weather exposure and aging.
Common Problems: – Rotting: Caused by moisture exposure over time. – Warping or Cracking: Occurs due to fluctuations in temperature and humidity. – Pest Damage: Termites or other wood-eating insects can compromise structural integrity.
Repair Solutions: – Replace rotting sections with treated wood. – Sand and seal warped or cracked boards to restore appearance and function. – Treat the fence with pest-resistant coatings or replace heavily damaged sections.
Vinyl Fences
Vinyl fences are low-maintenance but may still require occasional repairs due to damage or wear over time.
Common Problems: – Cracks or Breaks: Often caused by impacts or extreme temperatures. – Discoloration: UV exposure can lead to fading.
Repair Solutions: – Use vinyl repair kits to fill cracks or replace damaged panels entirely. – Apply UV-protective coatings periodically to maintain color vibrancy.
Tip: Regular cleaning with mild soap and water can prevent discoloration from dirt buildup.
Chain-Link Fences
Known for their durability, chain-link fences are often used for security purposes. Despite this, they are not immune to damage.
Common Problems: – Rusting: Over time, exposure to moisture can cause rust on metal components. – Sagging Mesh: Improper tension can lead the mesh fabric to sag.
Repair Solutions: 1. Remove rust using a wire brush and apply rust-resistant paint or coating. 2. Tighten sagging areas by adjusting tension bars and fasteners. 3. Replace severely corroded sections if necessary.
| Issue | Solution | Tools Needed |
| Rust | Wire brush & rust-resistant paint | Wire brush, paintbrush |
| Sagging Mesh | Adjust tension bars | Pliers, wrench |
Aluminum Fences
Aluminum fences combine elegance with resilience but may still encounter occasional problems requiring attention.
Common Problems: – Bends/Dents: Impact from heavy objects can deform aluminum panels. – Loose Fasteners/Hardware: Wear over time may loosen screws or brackets.
Repair Solutions: 1. Gently bend dented sections back into place using pliers or other tools designed for metalwork. 2. Tighten loose screws and replace any missing hardware promptly.
Wrought Iron Fences
Wrought iron fences add sophistication but demand consistent maintenance due to their susceptibility to rust and wear.
Common Problems: – Rust Formation: Particularly common in joints or areas where water collects. – Broken Bars/Sections: Result from physical impact or aging metal fatigue.
Repair Solutions: 1. Sand down rusted areas before applying primer and rust-resistant paint. 2. Weld broken sections professionally if structural integrity is compromised—a task typically best left to experts for safety reasons. 3. Inspect regularly for weak spots that could lead to larger issues if untreated.
Preventative Tips Across All Materials
- Regularly inspect your fence for signs of wear such as cracks, leaning posts, corrosion (metal), discoloration (vinyl), rot (wood), etc.
- Clean your fence periodically using appropriate methods for its material type—avoid harsh chemicals that could cause further damage.
- Apply protective sealants/coatings annually where needed (e.g., wood stains against moisture).
By addressing small problems early on, homeowners can avoid larger repairs down the line while ensuring their fence remains both functional and visually appealing over time.

How to Fix Leaning or Sagging Fence Posts for a Sturdy Structure
Leaning or sagging fence posts are a common issue that can compromise the structural integrity and aesthetics of your fence. Addressing this problem promptly can help maintain the durability and appearance of your fencing. Below, we explore actionable steps to fix leaning or sagging fence posts while ensuring a sturdy structure.
Causes of Leaning or Sagging Fence Posts
- Rotting Wood: Wooden posts can decay over time due to moisture exposure.
- Loose Soil: Shifting soil, especially after heavy rainfall, may undermine the stability of posts.
- Poor Installation: Insufficient depth when installing the post can cause it to tilt or move.
- External Forces: Damage caused by strong winds, falling trees, or pressure from nearby structures.
Tools and Materials Needed
- Shovel or post hole digger
- Level
- Gravel or crushed stone
- Concrete mix (for resetting)
- Wooden braces (optional for stabilization)
- Hammer and nails/screws
- New posts (if replacing damaged ones)
Step-by-Step Guide to Fixing Leaning Fence Posts
- Inspect the affected post(s) closely to determine whether they are salvageable or need replacement.
- Check if rot has compromised wooden posts or if soil erosion is causing instability.
- Use a shovel or post hole digger to loosen and remove soil around the base of the leaning post.
- If concrete was previously used as a base, carefully break it apart with a chisel and mallet.
- For minor adjustments, dig deeper into the ground where the post sits.
- Add gravel at the base of the hole for improved drainage and stability.
- Place the post back into position within its hole.
- Use a level to ensure it stands upright.
- Pour concrete mix around the base and allow it to set according to manufacturer guidelines.
- While waiting for concrete to cure, attach temporary wooden braces to keep your fence aligned correctly.
- Reattach rails, boards, or panels that may have come loose during repairs using nails, screws, or brackets.
Preventative Measures for Future Stability
- Opt for pressure-treated wood if using timber materials; this helps resist rot and decay.
- Ensure all posts are buried at least one-third of their length below ground for enhanced support.
- Use gravel under concrete bases as an added safeguard against water pooling near wooden structures.
- Regularly inspect fences after severe weather events and promptly address any signs of instability.
| Problem | Solution | Preventative Measure |
| Rotting Wooden Posts | Replace with pressure-treated wood | Apply sealant annually |
| Loose Soil | Reset in deeper hole with gravel/soil | Compact soil firmly during installation |
| Poor Installation | Reinstall at proper depth (min: 2ft) | Hire professional installation services |
Addressing leaning fence posts doesn’t just restore functionality but also extends your fence’s lifespan while maintaining curb appeal. Taking preventative steps ensures fewer repair needs in years ahead—making it both cost-effective and time-efficient over time.
Broken or Missing Boards: Repair Solutions for a Stronger Fence
Broken or missing boards in a fence can compromise its functionality, aesthetics, and privacy. Addressing this issue promptly is essential to maintain your fence’s structural integrity and ensure it continues to serve its purpose. Whether caused by weather conditions, accidents, or general wear and tear, repairing broken or missing boards doesn’t have to be overwhelming if approached properly.
Common Causes of Broken or Missing Boards
- Weather Damage: Exposure to harsh winds, heavy rain, snow, or prolonged sunlight may weaken wooden boards over time.
- Rotting: Moisture penetration can cause untreated wood to decay.
- Pest Infestation: Termites and other insects may damage wooden fences.
- Physical Impact: Falling tree limbs, vehicle collisions, or pressure from animals can lead to broken boards.
- Aging Materials: Over time, materials like wood and vinyl naturally degrade due to age.
By identifying the root cause of the damage, you can implement preventative measures moving forward.
Repairing Broken Fence Boards
- Inspect the entire fence for structural issues beyond the visibly damaged area.
- Determine whether only one board needs replacement or if adjacent components are also affected.
- Replacement board(s) matching the current material (wood/vinyl/etc.)
- Screws or nails
- A power drill, hammer, measuring tape, saw (if trimming is needed), and protective gear
- Use a claw hammer or pry bar to carefully remove any nails securing the damaged board.
- If screws are used instead of nails, unscrew them with a drill.
- Measure and cut replacement boards as needed to ensure an exact fit with existing panels.
- Securely attach them using screws for better long-term durability compared to nails.
- If using wooden boards, apply weatherproof treatments such as stain or sealant to protect against future moisture damage.
Addressing Missing Fence Boards
- Identify gaps left behind by missing panels.
- Replace lost fasteners (screws/nails) as required for proper installation.
- Confirm spacing alignment with existing fence panels before securing replacements.
Preventative Maintenance Tips
- Regularly inspect your fence for early signs of damage such as cracks or warping.
- Apply weatherproof coatings annually for wooden fences exposed frequently outdoors elements .
- Trim nearby tree branches away from fences reducing risk falling debris impact in storms .
| Material Type | Likely Cause of Damage | Suggested Repairs/Prevention |
| Wood | Rotting / Weather exposure | Seal wood regularly; replace rotted sections quickly. |
Gate Alignment Issues and How to Restore Smooth Functionality
A misaligned fence gate can be a frustrating issue for homeowners, as it compromises both the appearance and functionality of the fence. Over time, natural wear and tear, weather conditions, or improper installation can cause gates to sag, stick, or become misaligned. Addressing these issues promptly ensures your fence remains secure while maintaining its curb appeal. Below is a guide to understanding common gate alignment problems and the steps to fix them.
Common Causes of Gate Misalignment
- Loose or Worn Hinges: Hinges may become loose due to prolonged use or rust accumulation.
- Shifting Fence Posts: Changes in soil conditions, such as erosion or freezing and thawing cycles, may cause posts to shift.
- Heavy Gate Design: Overly large or heavy gates can pull on hinges and posts over time.
- Improper Installation: Poor initial installation could lead to uneven weight distribution.
- Weather Damage: Windstorms or fluctuating temperatures can warp wood gates or weaken fittings.
Steps to Fix a Misaligned Gate
- Check all hinges for signs of rust, looseness, or damage.
- Look at latch mechanisms for proper alignment with the receiving end on the fence post.
- Examine screws and nails for any that are missing or protruding.
- Use a screwdriver or power drill to tighten screws on loose hinges.
- If screws no longer hold because of wood deterioration, replace them with longer screws or fill holes with wood filler before reattaching the hinge.
- Install an adjustable turnbuckle brace diagonally across the back of the gate frame for added support.
- Tighten the brace until the gate sits evenly in its frame.
- If posts supporting your gate are leaning, dig around their base and reset them using concrete for added stability.
- Ensure posts are plumb (vertically straight) before securing them back into place.
- Swap out broken hinges, latches, or warped wooden panels with new ones that fit securely.
Preventative Measures for Maintaining Gate Alignment
- Regularly lubricate metal components such as hinges and latches with grease or WD-40.
- Avoid hanging heavy items like planters on gates as additional weight can accelerate sagging.
- Inspect posts annually for stability; repair minor shifts immediately to prevent further complications.
- Choose weather-resistant materials such as treated wood or galvanized steel when installing new gates.
| Problem | Solution | Tools Needed |
| Loose Hinges | Tighten screws/replace damaged hardware | Screwdriver/power drill |
| Sagging Gate | Install turnbuckle brace | Turnbuckle kit |
| Leaning Posts | Reset post in concrete | Shovel/quick-set concrete |
| Rusty Hardware | Replace components | Replacement hardware set |
By addressing minor alignment problems early on through regular inspections and maintenance efforts, you can avoid more extensive repairs down the line. Proper care ensures that your fence not only looks great but also functions smoothly year after year.
When DIY Fence Repairs Work and When Professional Help is Necessary
Maintaining a fence is essential for the security, privacy, and aesthetic value it provides to a property. While some homeowners are eager to tackle repairs themselves, not all fence issues can be handled with DIY solutions. Understanding when you can proceed on your own and when it’s time to call in a professional is key to ensuring the longevity and quality of your fence.
Common Fence Repairs Suitable for DIY
- Solution: Use nails or screws to re-secure loose boards.
- Tools Needed: Hammer, screwdriver, drill.
- Solution: Fill gaps using wood filler, then sand and paint over the area.
- Tools Needed: Sandpaper, wood filler, paintbrush.
- Solution: Replace missing fasteners with new ones of similar size.
- Tools Needed: Screwdriver or hammer.
- Solution: Use a shovel to adjust soil around the base and add gravel or concrete for extra support.
- Tools Needed: Shovel, level, concrete mix.
These tasks can often be completed within a few hours with minimal costs. However, it’s important to ensure proper attention is given to safety during these processes.
Situations That Call for Professional Intervention
Certain repairs require advanced skills or specialized equipment that most homeowners may not have access to. In such cases, hiring a professional ensures the repair work is done efficiently while maintaining structural integrity.
- If your fence has large sections that are severely damaged from storms or accidents, it’s best left to professionals who can assess whether replacement is needed instead of repair.
- Extensive rot requires expertise in removing damaged areas without compromising surrounding sections.
- Professionals can evaluate soil conditions and reinforce posts properly using techniques like augering or concrete pouring along with regrading where necessary.
- Fixing bent iron bars or broken welds involves specialized tools like welding machines which require training to operate safely.
- Repairing electrical fences demands an understanding of circuits and wiring safety standards that professionals are trained in handling appropriately.
Cost Comparison Table
| Repair Type | Average DIY Cost | Professional Service Cost |
| Replacing Loose Boards | $20-$50 | $100-$200 |
| Fixing Leaning Posts | $30-$100 | $150-$400 |
| Addressing Structural Damage | N/A | $500-$2,000+ |
Factors Influencing Your Decision
- Time Availability: Do you have sufficient free time? Some repairs require hours or even days of work.
- Budget Constraints: Factor in both material costs (for DIY) and labor expenses (for professionals).
- Tools & Equipment: Do you already own the necessary tools? Renting equipment may offset potential savings.
- Skill Level: Assess whether you have the expertise needed for complex tasks like leveling posts accurately or welding metal fencing components.
By weighing these considerations carefully, you’ll ensure your fence remains functional while saving money where possible—without sacrificing quality workmanship where it’s truly required.

Building Your Perfect Fence: Tips for Choosing the Best Design and Material
Selecting the perfect fence for your property is a decision that requires careful thought. A well-chosen fence not only enhances your property’s aesthetic appeal but also provides privacy, security, and durability. To ensure you make the right choice, here are tips to guide you in determining the best design and material for your fence.
Consider Your Purpose
- Privacy: If your goal is to create a secluded space, opt for taller fences with minimal gaps.
- Security: For added protection, consider sturdy materials like metal or composite that are harder to breach.
- Aesthetic Appeal: To complement your landscaping or home architecture, focus on decorative designs.
- Safety for Pets or Children: Choose fencing that prevents them from escaping while keeping unwanted visitors out.
- Noise Reduction: For homes near busy streets, soundproofing materials like vinyl can help reduce noise levels.
Evaluate Fencing Materials
| Material | Advantages | Disadvantages |
| Wood | Natural look; customizable; affordable | Requires regular maintenance; susceptible to rot |
| Vinyl | Low maintenance; durable; weather-resistant | Higher upfront cost |
| Aluminum | Lightweight; rust-resistant | Less privacy unless combined with panels |
| Chain Link | Affordable; durable | Lacks aesthetic appeal |
| Composite | Eco-friendly; looks like wood | Expensive upfront cost |
| Wrought Iron | Elegant design; highly durable | Prone to rust if not maintained |
Match Design to Architectural Style
- Modern Homes: Sleek horizontal slat fences made of wood or metal complement contemporary aesthetics.
- Traditional Properties: Picket fences or wrought iron designs often enhance classic home styles.
- Rustic Settings: Split rail fences or natural wood materials work well in rural environments.
- Urban Homes: Vinyl panel fencing offers clean lines while being practical in city settings.
Factor in Maintenance Requirements
The upkeep required varies significantly depending on material choice. For instance: – Wood fences may need staining or sealing every 2–3 years to prevent rot. – Metal options like wrought iron might require periodic rust treatment. – Vinyl and composite fencing demand little more than occasional cleaning with soap and water.
Understanding how much time and effort you’re willing to dedicate will help narrow down your options.
Assess Local Regulations and HOA Guidelines
Before installing a fence, check local building codes or homeowner association (HOA) requirements. Some neighborhoods have restrictions on height, style, or even material types. Adhering to these rules ensures hassle-free installation.
Budgeting Wisely
Fencing costs can vary widely based on material, height, length, and installation complexity. When budgeting: 1. Get multiple quotes from contractors if hiring professionals. 2. Factor in long-term maintenance costs alongside upfront expenses.
By carefully considering your purpose, preferred material qualities, design preferences, maintenance expectations, budget constraints, and local regulations, you can confidently build a fence that suits both your needs and property style while standing the test of time.
- How to Choose the Best Fencing Contractor Gainesville FL for Your Fence Installation Timeline
- How to Choose the Best Fence Company Gainesville FL for Your Property
- How a Fence Company Gainesville FL Can Help Solve Common Fence Problems Homeowners Face
- How to Choose the Best Fencing Contractor Gainesville FL for Your Property
- Effective Solutions for Fence Issues with a Fencing Contractor Gainesville FL
- Expert Advice from a Fencing Contractor Gainesville FL on Repairing and Strengthening Your Fence
- Effective Fencing Repair Solutions from a Trusted Fence Company Gainesville FL
- Fence Repair Gainesville FL: Understanding How Long It Really Takes
- How to Choose the Best Fencing Contractor Gainesville FL for Your Residential or Commercial Project
How to Choose the Best Fencing Contractor Gainesville FL for Your Property

Selecting the right fence installation company is a critical decision that can significantly impact the appearance, security, and value of your property. With numerous companies offering similar services, knowing what to prioritize can help ensure you make an informed choice. Below are some key factors and steps to guide you through the process.
1. Assess Your Specific Needs
Before reaching out to any company, it is important to define your requirements:
– Purpose of the Fence: Are you installing a fence for privacy, security, aesthetics, or property boundary marking?
– Material Preferences: Options include wood, vinyl, aluminum, chain link, wrought iron, and composite materials. Each comes with its unique advantages and maintenance requirements.
– Budget: Determine how much you’re willing to spend on materials and installation services.
Knowing these details in advance will help narrow down companies that specialize in meeting your specific needs.
2. Research Local Companies
Start by exploring fencing companies that operate in your region. This is advantageous because local installers are familiar with climate-related challenges and zoning regulations in your area. Use the following approaches to find potential candidates:
– Online Directories: Websites like Yelp or Angi often feature customer reviews for local service providers.
– Recommendations: Ask friends, neighbors, or family members who have previously installed fences about their experiences with certain companies.
3. Verify Credentials & Experience
Ensure that the fencing contractor you consider is properly licensed and insured. Look for these key credentials:
– A valid business license operating within your state or region. – General liability insurance to protect against damages during installation. – Workers’ compensation coverage if employees are involved on-site.
Additionally, evaluate the company’s experience by asking questions such as: – How long have they been installing fences? – Do they specialize in specific types of fencing (e.g., residential vs commercial)? – Can they share examples of past projects?
4. Request Multiple Estimates
Obtaining detailed written estimates from at least three companies allows for transparent cost comparisons without hidden fees or surprises later on. Each estimate should include information such as: | Item | Description | |————————–|—————————————-| | Materials | Type, quantity, and quality of materials being used | | Labor Costs | Estimated hours involved in installation | | Permits | Fees for obtaining necessary permits | | Cleanup Costs | Expenses for debris removal after installation |
Compare estimates carefully while keeping in mind that the cheapest option may not always offer high-quality service.
5. Read Reviews & Testimonials
Online reviews can provide insight into what others have experienced with a particular fencing contractor: – Look at patterns rather than isolated complaints; consistent negative feedback could indicate poor service. – Check reviews on trustworthy platforms like Google Reviews or Better Business Bureau (BBB).
For additional assurance, ask each company for references from previous clients whose projects were similar in scope.
6. Evaluate Customer Service
How a company communicates during initial consultations speaks volumes about its professionalism: – Are they responsive to inquiries?
– Do they seem knowledgeable about zoning laws and HOA guidelines?
– Are they willing to answer all questions regarding schedules or warranties?
A reliable contractor will provide clear timelines while being transparent about potential delays due to weather or other unforeseen circumstances.
7. Review Warranties & Contracts
Ensure all aspects of the project are outlined in writing before agreeing to proceed: 1. Warranty Terms – Does the company offer guarantees on both workmanship and materials? 2. Payment Schedule – Establish clear terms regarding deposit amounts versus final payment after completion. 3. Start/Completion Dates – Define realistic deadlines so expectations align between both parties.
By following these steps thoughtfully when choosing a fence installation company tailored specifically toward enhancing functionality/security/aesthetic goals ensures smoother project execution across diverse outdoor spaces
Key Factors to Consider for Fence Installation Gainesville FL
Essential Tips for Fence Repair Gainesville FL: Understanding Zoning Laws and Regulations
Before making any decisions, research local zoning laws and homeowners’ association (HOA) guidelines. These regulations often dictate the height, material, design, and placement of fences. Violating these rules could lead to fines or even the removal of your fence.
- Height Restrictions: Many areas restrict front yard fences to 3–4 feet for visibility and safety purposes.
- Material Limitations: Some neighborhoods prohibit certain materials like chain-link or barbed wire in the front yard.
- Permits: Confirm whether you need a permit for fence installation. Most municipalities require permits to ensure compliance with building codes.
Purpose of Your Front Yard Fence
Identify why you want a front yard fence. This will guide your choice of materials, height, and style.
- Privacy: Opt for taller fences made from solid materials such as wood or vinyl if blocking visibility is important.
- Security: Metal or wrought iron fences provide an additional layer of security without obstructing the view.
- Aesthetic Appeal: Decorative designs using picket fences or ornamental wrought iron can boost curb appeal while maintaining openness.
- Pet Containment: If keeping pets safe is a priority, consider sturdy materials with minimal gaps.
Choose the Right Material
| Material | Pros | Cons |
| Wood | Natural look, customizable | Requires regular maintenance |
| Vinyl | Low-maintenance, weather-resistant | Higher upfront cost |
| Wrought Iron | Elegant and durable | Susceptible to rust without care |
| Aluminum | Lightweight yet strong | Less privacy compared to solid options |
| Chain-Link | Affordable | Lacks visual appeal |
Each material has unique benefits; select one that balances functionality with style.
Design Harmony with Your Home’s Architecture
Your front yard fence should complement the overall aesthetic of your property. A modern home may pair well with sleek aluminum or horizontal wood panels, while a classic cottage might suit white picket fencing.
Consider these design tips: – Match the paint color of your fence to trim details on your house. – Blend landscaping elements around the fence for seamless integration. – Avoid overly ornate designs if they clash with minimalist architecture.
Budget Planning
- Evaluate material costs for upfront affordability vs long-term maintenance expenses.
- Factor in labor charges if hiring professionals.
- Allocate funds for permits and unexpected adjustments during construction.
Planning thoughtfully before installing a front yard fence not only ensures its functionality but also enhances your property’s overall value and appeal while adhering to community standards.
Important Considerations for Installing Fencing in Your Front Yard
Installing a fence in your front yard is a practical way to enhance privacy, improve curb appeal, and define property lines. However, before moving forward with the installation process, there are several important factors to consider to ensure your project is successful, compliant with local regulations, and tailored to your needs.
1. Understand Local Zoning Laws and Regulations
Before installing any fencing on your front yard, it is essential to review local zoning laws and homeowner association (HOA) guidelines. Here are key points to consider:
– Fence Height Restrictions: Many municipalities have specific rules governing the maximum height of front yard fences, often limiting them to 3-4 feet for visibility and safety purposes.
– Permits: Some regions may require a permit before you begin installation. Check with your local building department for details.
– Setback Requirements: There may be restrictions on how far the fence needs to be from sidewalks or streets.
Failing to comply with these regulations can result in fines or the need to remove the structure entirely.
2. Define the Purpose of Your Fence
Understanding the primary purpose of your fence will help you choose the right materials, design, and layout. Common reasons for installing front yard fences include:
– Aesthetic Appeal: To improve the overall look of your property’s exterior.
– Security: To deter trespassers or unwanted visitors from entering your property.
– Safety: To create a safer environment for pets or young children by preventing them from running into busy streets.
Depending on your goals, you might prioritize features like durability, decorative elements, or ease of maintenance.
3. Choose Durable Materials
| Material | Pros | Cons |
| Wood | Classic aesthetic; customizable | Requires regular maintenance |
| Vinyl | Low-maintenance; weather-resistant | Higher upfront cost |
| Aluminum | Lightweight; rust-resistant | May lack privacy |
| Wrought Iron | Highly durable; elegant look | Expensive; prone to rust without care |
| Chain Link | Affordable; easy installation | Minimal aesthetic appeal |
Consider factors such as climate conditions in your area when making this decision.
4. Plan for Landscaping Integration
The placement and style of your fence should complement existing landscaping features rather than compete with them. Think about how shrubs, flowers, or trees near your front yard will interact with the new structure:
– Leave adequate space between plants and fencing material for growth and maintenance access. – Opt for designs that allow sunlight through if you have plants that rely on direct light. – Incorporate climbing plants or vines into the design if you prefer a natural aesthetic around the fence.
Proper planning ensures that both elements coexist harmoniously while enhancing curb appeal.
5. Factor in Maintenance Requirements
Some fence styles demand more upkeep than others depending on their material and exposure to weather conditions over time: – Wood fences require periodic sealing or staining to prevent rot. – Metal fences may need rust treatment or repainting occasionally. – Vinyl fences are considered low-maintenance but should still be cleaned periodically with water and mild soap.
Evaluate whether you’re willing to commit time and resources necessary for maintaining certain types of materials before finalizing your choice.
6. Budget Wisely
Finally, establish a clear budget for all aspects of your project—from purchasing materials to labor costs if hiring professionals for installation work: 1. Get quotes from multiple vendors/installers. 2. Account for potential additional costs like permits or boundary surveys. 3. Avoid compromising quality solely based on price—investing wisely upfront can save money long-term by reducing repair/replacement needs later.
Proper budgeting ensures that you achieve a high-quality outcome without exceeding financial constraints while adding lasting value to your home’s exterior spaces.
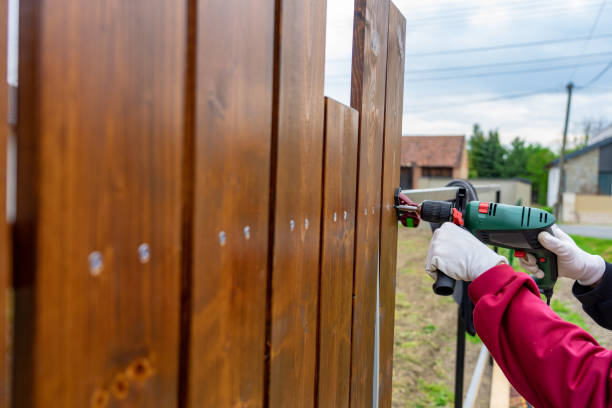
Finding the Best Fence Company Gainesville FL for Your Backyard Installation
Choosing the right time to install a backyard fence is essential to ensure efficiency, longevity, and cost-effectiveness. Several factors, including weather conditions, soil considerations, scheduling, and your overall property goals, should guide this decision. Below are key aspects to evaluate when determining the best time for fence installation.
Factors Influencing the Timing of Fence Installation
- Weather Conditions
The climate plays a significant role in the ease and success of fence installation. - Spring and Early Fall: These seasons are often considered ideal due to moderate temperatures and soil that is neither frozen nor overly dry. This makes digging post holes simpler and ensures better stability for fence posts.
- Summer: While summer provides consistent dry weather, extreme heat can make labor-intensive tasks more challenging for contractors or DIY installers.
- Winter: Installing during winter may be possible in regions with mild climates, but frozen ground can delay progress in colder areas.
- Soil Preparedness
Before installing a fence, consider your soil’s condition: - Loose or damp soil (common in spring) is easier to work with as it allows easier digging and better post stabilization.
- Avoid periods following heavy rainfall since excessively saturated soil may not provide adequate support for posts.
- Landscaping Plans
If you are undertaking landscaping projects such as planting gardens or laying down sod, it’s important to plan these activities around your fencing timeline: - Install fences first if they will act as boundaries or trellises for landscaping features.
- Coordinate timing with landscape designers if fencing impacts irrigation systems or plant layouts.
- Availability of Contractors
Professional fencing contractors often experience peak demand during warmer months like late spring and summer. Booking early ensures that you secure an experienced team at a time that works best for you. - Budget Considerations
Off-peak seasons like late fall or winter tend to have lower labor costs due to reduced demand for installation services. If saving money is a priority, consider scheduling during less busy seasons when discounts may be available.
Seasonal Pros & Cons Table
| Season | Pros | Cons |
| Spring | Ideal soil conditions; moderate temperatures | Higher contractor demand; potential rain delays |
| Summer | Long daylight hours; consistent weather | Extreme heat; higher labor costs |
| Fall | Cooler temperatures; flexible contractor schedules | Limited time before freezing begins |
| Winter | Potential off-season discounts | Frozen ground; weather unpredictability |
Signs It’s Time to Install a Backyard Fence
In addition to seasonal considerations, certain circumstances might indicate urgency in installing a backyard fence:
– You recently moved into a property without clear boundary markers. – Pets or children need a secure outdoor space. – Privacy concerns arise due to nearby development or changes in your neighborhood. – Existing fences show signs of wear such as leaning posts or broken panels.
Pro Tips for Timely Fence Installation
- Plan Ahead: Start researching contractors or materials well before your desired installation period—especially during peak seasons.
- Inspect Property Lines: Confirm legal property boundaries with local authorities before beginning any work on your yard.
- Choose Appropriate Materials: Some materials fare better than others depending on climate; wood fences may require finishing treatments if installed during wetter months.
By carefully assessing these factors and planning ahead, you can determine the optimal time frame that aligns with your budget and needs while ensuring durability and quality results for your new backyard fence.
Creative and Smart Ways to Use Fencing to Enhance Your Property
Fencing is not just a functional feature for your property—it can also serve as a design element that boosts curb appeal, enhances privacy, and provides unique opportunities for creativity. By thinking beyond the traditional and incorporating thoughtful designs, materials, and placements, you can transform your fencing from a simple barrier into an integral part of your outdoor space. Below are some creative and smart ways to use fencing to enhance your property.
1. Combine Functionality with Aesthetic Appeal
Fences don’t have to be purely utilitarian. Blending form and function can result in a structure that serves multiple purposes:
– Decorative panels: Incorporate laser-cut metal or artistic wood panels into your fence design for a modern touch.
– Mixed materials: Combine wood with metal or stone accents to create a layered, visually appealing fence.
– Color customization: Use bold or neutral hues for the fence to either make it stand out as a statement piece or blend seamlessly with the rest of the landscape.
2. Create Outdoor “Rooms”
Fencing can divide outdoor areas into specific zones, creating designated spaces without requiring walls or heavy construction:
– Dining areas: Use partial fences like horizontal slats to enclose an al fresco dining area while maintaining an open feel.
– Gardens: Enclose flower beds or vegetable gardens with low decorative fences for both protection and visual separation.
– Play zones: Separate play areas for children with colorful, shorter fences designed to enhance safety without obstructing views.
3. Add Greenery and Vertical Gardens
Fences provide an excellent base for incorporating greenery into your outdoor design:
– Climbing plants such as ivy, jasmine, or roses can be grown along wooden or trellis-style fences. Over time, they create vibrant green walls that add both privacy and beauty.
– Install planter boxes directly onto the fence for growing herbs, flowers, or succulents vertically—a great way to maximize limited yard space. – Consider using modular fencing systems designed specifically for vertical gardening.
| Plant Suggestions | Ideal Fencing Material | Maintenance Level |
| Ivy | Wood/Trellis | Moderate |
| Jasmine | Trellis/Metal | Low |
| Succulents | Planter Boxes | Low |
4. Incorporate Lighting Features into Fencing Design
- Attach solar-powered lights along posts or panels for energy-efficient illumination during nighttime hours.
- Add string lights above low fences in patio areas for soft lighting that enhances evening gatherings.
- Use LED strips embedded in modern metal fences to give them a sleek glow after sunset.
5. Privacy Screens with Unique Patterns
For urban properties where privacy is essential yet space is limited, opt for fencing designs that double as privacy screens: – Horizontal slat designs allow airflow while obstructing direct views from neighbors. – Perforated metal sheets with geometric patterns act as stylish partitions. – Frosted glass panels inserted within wood frames provide privacy without sacrificing light.
6. Statement Entrances
A creatively-designed gate paired with complementary fencing makes an impactful first impression on visitors: – Enhance entryways using wrought iron gates featuring intricate curves or scrollwork. – Wooden gates integrated into picket-style fencing can evoke rustic charm while remaining functional. – Incorporate arches over gates adorned with vines or fairy lights for added character.
By combining practicality with creativity in these ways, you not only protect your property but also enhance its overall aesthetic value—making it more enjoyable while increasing curb appeal simultaneously.
- How to Choose the Best Fencing Contractor Gainesville FL for Your Fence Installation Timeline
- How to Choose the Best Fence Company Gainesville FL for Your Property
- How a Fence Company Gainesville FL Can Help Solve Common Fence Problems Homeowners Face
- How to Choose the Best Fencing Contractor Gainesville FL for Your Property
- Effective Solutions for Fence Issues with a Fencing Contractor Gainesville FL
- Expert Advice from a Fencing Contractor Gainesville FL on Repairing and Strengthening Your Fence
- Effective Fencing Repair Solutions from a Trusted Fence Company Gainesville FL
- Fence Repair Gainesville FL: Understanding How Long It Really Takes
- How to Choose the Best Fencing Contractor Gainesville FL for Your Residential or Commercial Project
Effective Solutions for Fence Issues with a Fencing Contractor Gainesville FL

Fences are essential for defining property boundaries, enhancing security, and boosting curb appeal. However, like any outdoor structure, they are exposed to environmental elements and inevitable wear over time. Below are some common fence problems homeowners face and practical steps to resolve them.
1. Rotting Wood
Wooden fences are especially vulnerable to rot due to moisture exposure. Left untreated, rotting wood can spread and weaken the entire structure.
Causes:
– Prolonged contact with soil or water
– Poor drainage around the fence line
– Insufficient weatherproofing treatments
Solutions:
– Replace affected sections: Remove severely rotted boards or posts and replace them with treated wood.
– Apply a sealant: Use a water-repellent wood preservative annually to protect against moisture damage.
– Improve drainage: Ensure proper grading around your fence to prevent standing water near its base.
2. Leaning or Uneven Fences
A leaning fence not only looks unappealing but also compromises the structural integrity of the entire installation. This issue is often caused by shifting soil or damaged posts.
Causes:
– Soil erosion or loose footing
– Decayed wooden posts underground
– Improper installation (e.g., insufficient post depth)
Solutions:
– Reinforce posts: Secure leaning sections by adding concrete reinforcements around wobbly posts.
– Adjust tension wires (for chain link fences): Tighten loose wires for additional support.
– Install deeper posts: Ensure new post replacements extend at least 2 feet into the ground for increased stability.
| Problem | Causes | Solution |
| Soil erosion | Heavy rainfall loosening ground | Add gravel or create proper grading |
| Shallow footing | Posts not buried deep enough | Reinstall at the correct depth |
3. Rust on Metal Fences
Metal fences such as wrought iron or chain link varieties are prone to rust over time, especially in areas with high humidity or exposure to saltwater.
Prevention Tips & Solutions:
1. Clean rusted spots with sandpaper or a wire brush. 2. Apply rust-resistant primer and paint designed specifically for metal fencing. 3. Consider powder-coating treatments for added durability. 4. Regularly inspect the fence for small rust patches before they spread.
4. Loose Fence Panels
Fence panels may come loose due to strong winds, aging fasteners, or improper construction techniques during installation.
Steps to Fix Loose Panels: 1. Identify unstable panels by gently shaking each section of your fence. 2. Secure panels using galvanized screws that resist corrosion. 3. Replace old nails with screws if necessary for better hold strength. 4. Add brackets where needed for extra reinforcement along horizontal rails.
5. Pest Damage in Wooden Fences
Termites and other pests can wreak havoc on wooden fences if left unchecked.
Symptoms of Pest Damage: – Small holes in the wood – Hollow-sounding posts when tapped – Presence of sawdust-like material near the base
Actionable Steps: 1. Treat affected areas with pesticide solutions specifically formulated for termites. 2. Replace heavily infested boards immediately. 3. Schedule regular inspections from pest control professionals if you live in a termite-prone area.
Maintenance Checklist for Long-Term Fence Health
- Inspect fences quarterly for signs of damage (e.g., rust, rot).
- Reapply protective coatings (wood stain/sealant) annually depending on material type.
- Trim vegetation around your fence regularly to reduce exposure to moisture buildup from plants touching the surface.
Expert Tips from a Fence Company Gainesville FL: DIY Repairs to Keep Your Fence Durable
Proper maintenance and timely repairs can significantly extend the lifespan of your fence. While some issues may require professional assistance, many small problems can be fixed on your own with basic tools and a bit of effort. Here’s a detailed guide to tackling common DIY fence repairs to maintain durability.
Essential Tools and Materials for Fence Installation Gainesville FL
- Hammer
- Screwdriver (manual or power)
- Drill
- Pliers
- Saw (hand or electric, depending on the repair)
- Spirit level
- Replacement boards or panels
- Screws, nails, or brackets
- Wood glue (for minor cracks in wooden fences)
- Weatherproof wood stain or paint
- Concrete mix (for resetting posts)
Having these items readily available will make the repair process smoother and more efficient.
Repairing Loose Boards or Panels
- Inspect the loose board for damage. Replace it if it’s cracked beyond repair.
- Secure the board back in place using screws or nails.
- For additional stability, consider reinforcing with metal brackets.
- Seal any exposed wood with weatherproof paint or stain.
Fixing Minor Cracks in Wooden Fences
- Clean out debris from the crack using a soft brush.
- Apply wood glue into the crack and clamp it tightly until dry.
- Sand down any rough edges once the glue has set.
- Finish with a coat of weather-resistant stain or paint.
Addressing Rusty Metal Components
- Remove surface rust using sandpaper or a wire brush.
- Apply rust-preventive primer and repaint affected areas.
- Lubricate moving parts like hinges to prevent further wear.
Preventative Maintenance Tips
- Conduct visual inspections every few months to identify potential problems early.
- Clear away debris such as leaves that accumulate at the base of your fence to avoid moisture damage.
- Apply sealant or weatherproof coating annually for wooden fences.
Table: Quick Repair Reference Guide
| Issue | Cause | Solution |
| Loose boards | Worn nails/screws | Reattach using screws/brackets |
| Minor cracks | Moisture expansion | Fill with wood glue; sand & seal |
| Rusted metal components | Weather exposure | Remove rust, prime, and repaint |
| Leaning fence sections | Weak posts | Reinforce post with concrete |
By handling these small fixes yourself, you can maintain your fence’s durability while saving on repair costs over time. Regular inspections coupled with prompt action are key to keeping your fence in top condition for years to come.
Fence Replacement vs. Repair: Deciding the Best Option for Your Needs
When your fence begins to show signs of wear or damage, it can be challenging to determine whether repair or replacement is the best course of action. Both options come with their own advantages and considerations, but making the right choice depends on factors such as the extent of damage, material type, and long-term maintenance goals. Below is a comprehensive guide to help you decide.
1. Extent of Damage
- Repair: Minor issues like loose nails, small cracks, or isolated rotting in wooden fences are often repairable without much cost or effort.
- Replacement: If large sections of your fence are damaged (e.g., widespread rot, warping, or rusted metal panels), replacing may be more practical.
2. Material Type
- Wood Fences:
- Repairs are feasible for smaller issues like warped planks or broken pickets.
- However, if a significant portion is rotted due to moisture exposure, replacement might be necessary.
- Vinyl Fences:
- Vinyl repairs can be tricky since cracks in vinyl cannot always be patched effectively.
- Replacement often becomes necessary when damage occurs.
- Metal Fences:
- Small dents and rust spots can typically be repaired by sanding and repainting.
- Widespread rust or bent sections generally require full panel replacements.
3. Age of the Fence
Consider the lifespan of your fencing material: – Wooden fences last 15-20 years on average with proper maintenance. – Vinyl and metal fences tend to last longer (25+ years).
If your fence is nearing the end of its expected lifespan, replacement will likely provide better long-term value.
Pros and Cons: Repair vs. Replacement
| Aspect | Repair | Replacement |
| Cost | Lower upfront cost | Higher initial investment |
| Time | Requires less time for minor fixes | May take days for full installation |
| Durability | Fixes may weaken over time | Offers a fresh start with a new structure |
| Aesthetics | Repairs might stand out visually | Uniform appearance with new materials |
Signs That Replacement Is Necessary
- More than 30% of the structure shows damage (e.g., rot, rust, warping).
- The posts have become unstable despite multiple attempts at reinforcement.
- The fencing material has deteriorated significantly due to weather exposure or age.
- Repairs end up costing more than half the price of installing a new fence.
Tips for Making the Decision
- Perform a thorough inspection—or hire a professional—for an accurate assessment of the damage.
- Compare costs using quotes from contractors for both repairs and replacement options.
- Factor in long-term maintenance when choosing between repairing your current fence and investing in a new one.
By carefully weighing these elements against your budget and aesthetic preferences, you can ensure that you’re making an informed decision that meets both your immediate needs and long-term goals.

Broken Fence Posts: Steps to Restore Stability and Strength
Broken fence posts can compromise the structure and stability of your entire fence. Addressing this issue promptly is essential to maintain the durability, safety, and aesthetic appeal of your property. Below are steps to effectively restore broken fence posts, along with tips on prevention and maintenance.
Identifying a Broken Fence Post
- Visible cracks or splits: These often occur due to weathering or impact.
- Leaning or wobbling posts: Signals a weakened base or structural failure.
- Rotting wood (in wooden posts): Often caused by prolonged exposure to moisture.
- Corrosion (in metal posts): Rust can weaken the integrity of metal fence supports.
Tools and Materials Needed
- Shovel or post hole digger
- Replacement post (if necessary)
- Concrete mix
- Level
- Hammer and nails or screws
- Saw (for trimming wooden posts)
- Pry bar (for removing damaged components)
Having the right tools ensures efficiency during repairs.
Step-by-Step Guide to Fixing Broken Fence Posts
- Dig around the base of the broken post using a shovel.
- If concrete surrounds the old post, break it apart carefully with a pry bar.
- Extract all remnants of the damaged post from its position.
- Clear out debris from the hole left behind.
- Widen and deepen the hole if necessary, ensuring it’s at least 1/3rd the height of your new post for maximum stability.
- Insert a new post into position if replacement is required.
- For reinforcing an existing damaged wooden post, consider using steel brackets or “post menders” secured tightly around its base.
- Mix concrete according to manufacturer instructions.
- Pour it into the hole surrounding your new or repaired post while ensuring proper alignment using a level.
- Allow sufficient curing time based on weather conditions before applying pressure to the repaired section.
- Once stable, reattach rails, panels, or boards onto your repaired/replaced fence post using appropriate fasteners such as screws or nails.
Preventative Measures for Fence Post Longevity
- Use pressure-treated wood for wooden posts to resist rot and insect damage.
- Add gravel beneath posts during installation for improved drainage in wet conditions.
- Regularly inspect fences for early signs of damage such as splintering, leaning, or loose fasteners.
- Maintain proper sealing or staining on wood surfaces every couple of years.
| Type of Damage | Best Solution | Prevention Tip |
| Rotting Wood | Replace with treated wood | Apply sealant/stain; avoid water pooling |
| Leaning Posts | Re-secure with gravel/concrete base | Install deeper foundations |
| Corroded Metal | Replace with rust-resistant materials | Use galvanized steel; apply anti-rust coating |
By following these steps and incorporating regular maintenance practices into your routine, you can extend both functionality and lifespan while keeping your fence structurally sound and visually appealing over time.
Loose Fence Panels: Causes, Solutions, and Prevention Tips
Loose fence panels are a common issue that can compromise the structural integrity and appearance of your fence. Understanding the causes, addressing the problem effectively, and implementing preventative measures can help maintain your fence’s durability and functionality over time.
Common Causes of Loose Fence Panels
- High winds can displace panels or loosen their fixings.
- Heavy rain can weaken wooden posts or cause soil erosion around post bases.
- Insufficiently secured fasteners may result in panels detaching over time.
- Inadequate support structures, such as improperly aligned posts, can lead to instability.
- Wooden fences may shrink, warp, or crack with age due to moisture fluctuations.
- Metal fences may experience rust or corrosion that weakens their components.
- Shifting soil caused by natural settling or excavation work nearby can disturb the alignment of posts and panels.
Effective Solutions for Loose Fence Panels
- Inspect for Damage:
Before making repairs, assess the extent of the damage to determine whether it’s localized or indicative of a larger structural issue. - Reattach Panels Securely:
Use appropriate fasteners such as galvanized nails or screws to reattach loose panels to their supporting posts or rails. - Reinforce Weak Posts:
If loose panels are due to unstable posts:- Add bracing for temporary support.
- Replace damaged posts if they are beyond repair.
- Use concrete at the base of wooden posts for added stability.
- Replace Broken Components:
Damaged rails, brackets, or connectors should be replaced with new materials that match the existing structure for uniformity. - Check Alignment:
Ensure that all fence components—posts, rails, and panels—are properly aligned to restore a secure connection between sections.
Prevention Tips for Long-Lasting Fence Stability
- Use Quality Materials
Opt for weather-resistant wood (e.g., cedar or redwood) or treated metal components to withstand environmental stresses. - Conduct Regular Inspections
Examine your fence periodically for signs of wear:- Look for rust on metal parts.
- Check wood for rot, warping, or cracks.
- Inspect fasteners like screws and nails to ensure they remain secure.
- Seal Wooden Fences
Apply sealant annually to protect wood from moisture damage that can lead to shrinkage or decay. - Anchor Posts Properly
Set all posts in concrete below frost level to prevent shifting caused by freezing and thawing cycles in colder climates. - Trim Nearby Vegetation
Overgrown plants pressing against your fence can strain its structure over time; keep bushes and trees neatly trimmed away from the fence line.
| Problem | Solution | Prevention Tip |
| Weather-related loosening | Reattach with screws/nails | Use weather-resistant materials |
| Poor installation | Secure misaligned components | Hire professional installers |
| Material aging | Replace damaged parts | Seal wood; inspect regularly |
By understanding these causes and solutions while employing preventive strategies, you can ensure your fence remains secure and visually appealing for years without frequent repairs becoming necessary.
Sagging Fences: Understanding the Causes and How to Fix Them
A sagging fence can be an eyesore and a safety concern, diminishing the functionality of your property’s boundary. Understanding why fences sag and how to remedy the issue is crucial for maintaining a sturdy, long-lasting structure. Below, we explore common causes of sagging fences and provide actionable solutions.
Common Causes of Sagging Fences
- Fence posts provide structural support for your fence. Over time, wooden posts may rot due to moisture exposure, while metal posts can corrode or weaken. As they deteriorate, the fence begins to lean or sag.
- Shifting soil or erosion caused by excessive rainfall can destabilize fence post foundations, leading to misalignment and eventual sagging.
- Improperly installed posts that are not set deep enough into the ground (or without proper concrete footings) are prone to loosen over time, contributing to a sagging structure.
- Heavy gates may cause nearby panels or posts to tilt if not properly reinforced. Additionally, climbing plants like ivy can add significant weight to fencing material over time.
- Older fences made of wood or vinyl can warp, crack, or bow with age, reducing their ability to stand straight and maintain alignment.
Steps to Fix a Sagging Fence
- Inspect each post for damage such as rot or cracks.
- For minor instability:
- Use braces or anchors to secure weak posts.
- Pack soil tightly around loosened posts after leveling them.
- Dig out the old post using a shovel.
- Replace with a new treated wood post or metal one set in concrete for added stability.
- Tighten screws and nails on wobbly panels using proper tools.
- Remove them carefully.
- Replace with new boards cut to size for consistency.
- Refill areas around posts with gravel and soil mixture for better drainage.
- Install retaining walls if necessary in sloped areas prone to erosion.
- Realign gate hinges if uneven weight distribution is causing sagging.
- Add diagonal bracing behind gates for extra strength where needed.
Tips for Prevention
- Use pressure-treated wood resistant to rot when replacing parts of your fence.
- Regularly inspect all components for signs of damage like rust on screws, loose nails, mold growth on wood surfaces, etc.
- Ensure proper drainage around your fence line by diverting rainwater away from base structures.
- Avoid placing excessive weight (e.g., planters) on panels unless properly supported by reinforced brackets.
| Problem | Cause | Solution |
| Weak Posts | Rotting wood; shallow installation | Replace post; secure in concrete |
| Loose Panels | Improper fastening; warping | Tighten screws/nails; replace boards |
| Soil Erosion | Heavy rainfall; poor drainage | Refill soil; install retaining wall |
| Gate Stress | Uneven hinge alignment; heavy materials | Realign hinges; add bracing |
By addressing these issues early on using effective repair techniques and preventive measures, you can extend the life of your fence while maintaining its aesthetic appeal and structural integrity over time.
- How to Choose the Best Fencing Contractor Gainesville FL for Your Fence Installation Timeline
- How to Choose the Best Fence Company Gainesville FL for Your Property
- How a Fence Company Gainesville FL Can Help Solve Common Fence Problems Homeowners Face
- How to Choose the Best Fencing Contractor Gainesville FL for Your Property
- Effective Solutions for Fence Issues with a Fencing Contractor Gainesville FL
- Expert Advice from a Fencing Contractor Gainesville FL on Repairing and Strengthening Your Fence
- Effective Fencing Repair Solutions from a Trusted Fence Company Gainesville FL
- Fence Repair Gainesville FL: Understanding How Long It Really Takes
- How to Choose the Best Fencing Contractor Gainesville FL for Your Residential or Commercial Project
Expert Advice from a Fencing Contractor Gainesville FL on Repairing and Strengthening Your Fence

A well-maintained fence not only enhances the visual appeal of your property but also ensures safety, privacy, and durability. Over time, fences are exposed to various elements such as weather, wear-and-tear, and unforeseen damage. When this happens, taking the proper steps to repair and strengthen your fence is vital to extend its life and maintain its functionality. Below are some essential tips to guide you through the process.
Inspect Your Fence Regularly
- Cracks or splinters in wood fences.
- Rust spots on metal fences.
- Loose or wobbly posts.
- Signs of rot or insect damage.
- Warping or misaligned panels.
By staying proactive, minor repairs can be completed before turning into major problems.
Gather the Right Tools and Materials
Tools: – Hammer – Screwdriver or power drill – Level – Measuring tape – Post-hole digger – Circular saw (if cutting is needed)
Materials: – Replacement wood boards or panels – Galvanized nails or screws – Wood filler or epoxy (for wooden fences) – Rust-resistant paint (for metal fences) – Gravel and cement mix (for resetting posts)
Using quality materials ensures long-lasting repairs.
Reinforce Weak Sections
Over time, certain sections may weaken due to environmental stressors. Strengthening these areas is crucial for maintaining fence stability.
- Use wood glue or epoxy for minor cracks.
- Replace severely damaged boards with new ones that match in size and material.
- Apply sealant after repairs to protect against moisture.
- Remove rust using a wire brush before applying rust-resistant paint.
- Tighten loose bolts or screws in metal panels with a wrench.
- Consider adding supports if sections feel unstable.
- Replace broken vinyl panels entirely since patching may not be effective.
- Use manufacturer-approved adhesive for minor cracks.
Strengthen Fence Posts
| Issue | Causes | Fix |
| Leaning posts | Loose soil or poor anchoring | Dig around the post, add gravel/cement for stability |
| Rotten posts | Moisture exposure | Replace the entire post; ensure proper sealing |
| Wobbly posts | Weak connections | Use brackets to secure posts firmly |
Regular maintenance of posts ensures that your entire fence remains stable.
Prevent Future Issues
- Apply stain, paint, or sealant annually for wooden fences to protect against rain and sun damage.
- Inspect metal fencing regularly for signs of rust; touch up paint as needed.
- Trim nearby vegetation that could cause wear-and-tear by rubbing against panels over time.
- Ensure proper drainage around your fence base to avoid water pooling.
With consistent care and timely repairs, your fence will remain strong and functional for years to come while preserving its aesthetic value.
Expert Tips from a Fence Company Gainesville FL on Fixing Leaning or Broken Fence Posts
Fence posts are the backbone of your fence, providing stability and support. When a post leans or breaks, it can compromise the entire structure. Repairing or replacing damaged posts is crucial to maintaining a durable fence that stands strong over time. Below, we explore effective steps and strategies to fix leaning or broken fence posts.
Essential Tools and Materials for Fence Installation Gainesville FL
Before starting any repair work, gather the necessary tools and materials:
– Shovel – For digging around the damaged post.
– Post-hole digger – To create a deeper and more secure foundation.
– Gravel – Assists with drainage around the post base.
– Concrete mix – Strengthens the base and prevents future movement.
– Level tool – Ensures proper alignment of the post.
– Screws or nails – To re-attach rails after repairs are complete.
– Replacement post (if needed) – In case the original post cannot be salvaged.
1. Assess the Damage
Start by examining the state of your leaning fence post:
– Is it loose due to soil erosion?
– Has the wood rotted or cracked?
Understanding these causes will help determine whether repairs are possible, or if a full replacement is necessary.
2. Stabilize the Surrounding Area
Remove any debris, plants, or loose soil around the base of the leaning post. Use a shovel to clear away excess dirt until you can access its foundation.
3. Straighten the Post
Position yourself so you can gently push or pull on the leaning post until it stands straight again. Use temporary braces (such as wooden stakes tied with rope) to hold it in place while you work on securing it permanently.
4. Reinforce with Gravel and Concrete
Create a stable footing by adding gravel at the bottom of your hole for better drainage:
| Material | Purpose | Amount Needed |
|——————-|——————————-|————————————|
| Gravel | Improves water drainage | Approximately 3 inches deep |
| Concrete mix | Secures post in place | Enough to fill two-thirds of hole |
Pour concrete mix into space around your straightened fence-post & allow drying overnight before removing bracing material

Repairing Broken or Loose Fence Panels to Restore Stability
Fence panels are a critical part of any fencing system, providing both structural integrity and visual appeal. Over time, panels can loosen, break, or become dislodged due to environmental factors such as strong winds, heavy rainfall, or natural wear and tear. Properly repairing broken or loose fence panels not only restores your fence’s stability but also prolongs its overall lifespan. Below are practical steps and tips for addressing these issues effectively.
Step 1: Assess the Damage
- Panels that are cracked, splintered, or rotting.
- Loose connections between the panels and supporting posts.
- Warping caused by moisture exposure or temperature changes.
- Hardware that may be rusted, bent, or missing.
Use a checklist to ensure nothing is overlooked during your inspection.
| Type of Damage | Common Causes | Immediate Action Required |
| Cracked Panels | Impact from objects; weathering | Replace or reinforce with braces |
| Loose Panels | Worn-out fasteners; strong winds | Tighten screws/replace connectors |
| Warped Wood | Moisture absorption | Flatten with clamps or replace |
Step 2: Gather Necessary Tools and Materials
- Hammer and nails
- Screwdriver (manual or electric)
- Deck screws
- Replacement panels (if necessary)
- Wood glue for minor cracks
- Level tool to ensure proper alignment
- Weatherproof sealant for added protection
Having these tools on hand will streamline the process and minimize disruptions.
Step 3: Reattach Loose Panels
- Remove any damaged nails or screws holding the panel in place.
- Use new deck screws or galvanized nails to securely reattach the panel.
- If brackets were used initially but are now bent or broken, replace them with new ones.
- Check alignment using a level tool before tightening all fasteners.
For extra security in high-wind areas, consider installing additional brackets along the edges of each panel.
Step 4: Replace Broken Panels
- Remove it carefully by unscrewing fasteners connected to adjacent sections.
- Measure the dimensions of the removed panel so you can find an appropriate replacement.
- Install the new panel by aligning it with adjacent sections and securing it with screws.
- Apply weatherproof sealant around joints to prevent future moisture damage.
Preventative Measures After Repairs
- Apply a protective finish such as paint, stain, or sealant annually.
- Inspect your fence seasonally for potential damage from storms or other environmental factors.
- Trim nearby vegetation that could trap moisture against panels and contribute to rot.
By following these measures consistently, you can significantly reduce future repair needs while keeping your fencing robust and stable.
Addressing Common Fence Issues Like Rot, Rust, and Warping
Fences are exposed to the elements year-round, and over time, they can develop common issues such as rot, rust, and warping. Properly addressing these issues can prolong the life of your fence while maintaining its structural integrity and aesthetic appeal. Below is a guide to identifying and resolving these common problems.
1. Tackling Rot in Wooden Fences
- Identify the Affected Areas: Conduct a thorough inspection of your fence for signs of rot, such as discoloration, softness in wood, or fungal growth.
- Remove Rotted Sections: Use a saw or chisel to remove any visibly rotted wood. Be sure to cut at least 12 inches beyond the damaged area to ensure all decayed material is eliminated.
- For minor damage: Use wood fillers or epoxy resin to fill small gaps left by removed rot.
- For extensive damage: Replace entire sections or boards with treated lumber that resists decay.
- Apply wood preservatives or sealants annually.
- Ensure proper drainage around the base of the fence by clearing debris and keeping vegetation trimmed.
2. Dealing with Rust on Metal Fences
Rust can weaken metal fences over time if not treated promptly. Addressing rust involves cleaning affected areas and taking preventative measures.
- Use a wire brush or sandpaper to scrub off loose rust from affected areas.
- Wash the surface with soapy water and allow it to dry completely.
- Coat cleaned metal surfaces with a rust converter or primer specifically designed for metal fencing.
- Add a protective layer of weather-resistant paint for extra durability.
- Inspect your fence periodically for signs of rust development.
- Repaint every few years to maintain protection against moisture.
| Tool Needed | Purpose |
| Wire Brush | Scrubbing away loose rust |
| Sandpaper | Smoothing out rough surfaces |
| Rust Converter | Neutralizing existing rust |
3. Resolving Warped Panels in Wooden Fences
Warping occurs when wooden panels expand and contract unevenly due to changes in humidity or temperature.
- Remove warped boards carefully using a hammer or drill.
- Soak the board in water overnight (optional) to make it more pliable for reshaping.
- Lay it flat under heavy weights until it dries completely straightened.
- Reinstall using screws instead of nails for better stability.
- Replacing Severely Warped Panels: If straightening doesn’t work, replace warped boards with properly treated lumber that’s less prone to warping.
- Stain or seal your fence regularly to protect against moisture penetration that causes warping.
- Consider installing fences made from composite materials if you live in areas with extreme weather fluctuations.
Regular maintenance combined with timely repairs can help protect your investment while ensuring your fence remains strong and functional over time.
Key Steps to Assess Fence Damage and Plan Effective Repairs
Properly assessing fence damage is a critical first step in ensuring effective and lasting repairs. Whether your fence serves as a boundary for privacy, security, or aesthetics, understanding the extent of the damage and planning repairs strategically can save time, effort, and costs in the long run. Below are key steps to guide you through this process.
Step 1: Conduct a Visual Inspection
Start with a thorough visual inspection of your fence to identify visible signs of wear or damage. Look for:
– Broken or missing panels: Check for panels that are cracked, splintered, or entirely missing.
– Leaning posts: Inspect whether any posts are leaning due to soil movement or structural weakness.
– Rot or decay: For wooden fences, check areas near the ground where rot is common due to moisture exposure.
– Rust and corrosion: On metal fences, examine joints, screws, and connections for rust accumulation.
– Warping or bowing: Look for panels that appear bent or warped due to weather conditions like extreme heat or moisture.
Take detailed notes on each issue identified so you can prioritize repairs effectively.
Step 2: Test Structural Stability
- Push against posts to see if they wobble.
- Gently shake panels to detect loose connections.
- If relevant, inspect gates for misalignment or difficulty opening/closing.
Knowing whether a section is still structurally sound versus weakened will help determine if replacement might be more appropriate than repair.
Step 3: Identify Underlying Causes of Damage
| Issue | Possible Cause |
| Rot in wooden fences | Prolonged exposure to moisture; poor sealing |
| Leaning fence posts | Soil erosion; improper initial installation |
| Rust on metal components | Lack of protective coating; high humidity |
| Warping panels | Fluctuating temperatures; water absorption |
Addressing these underlying causes (e.g., improving drainage around wooden fences) ensures that future repairs will be minimized.
Step 4: Evaluate Repair vs Replacement Needs
- Opt for repairs if damage is localized (e.g., one broken panel) and overall structure remains intact.
- Consider replacement if over 30%–50% of the structure shows significant wear or instability.
This evaluation ensures cost-effectiveness while maintaining safety and aesthetics.
Step 5: Gather Tools and Materials Needed for Repairs
Tools:
– Hammer/Drill
– Screwdriver set
– Saw (for wood)
– Level
Materials:
– Replacement panels or boards
– Screws/nails suitable for outdoor use
– Wood sealant/metal paint as applicable
Double-check measurements before purchasing materials to reduce waste during installation.
Following these steps ensures an organized approach when tackling fence maintenance tasks while prolonging its lifespan effectively under various weather conditions.
- How to Choose the Best Fencing Contractor Gainesville FL for Your Fence Installation Timeline
- How to Choose the Best Fence Company Gainesville FL for Your Property
- How a Fence Company Gainesville FL Can Help Solve Common Fence Problems Homeowners Face
- How to Choose the Best Fencing Contractor Gainesville FL for Your Property
- Effective Solutions for Fence Issues with a Fencing Contractor Gainesville FL
- Expert Advice from a Fencing Contractor Gainesville FL on Repairing and Strengthening Your Fence
- Effective Fencing Repair Solutions from a Trusted Fence Company Gainesville FL
- Fence Repair Gainesville FL: Understanding How Long It Really Takes
- How to Choose the Best Fencing Contractor Gainesville FL for Your Residential or Commercial Project